


☁️ Rust Cloudflare Workers #
In this post, we step beyond initial setup and the basics of Rust Cloudflare workers, where you write worker code in the Rust language and compile to WASM. In a previous post, we saw how to set up your system for writing Rust, as well as building out a router for a Rust API. Here, we look at parsing form data on an incoming API HTTP request and also sending HTTP requests to external servers.
Turnstile #
We will step things up a notch, adding an API route which can be used as a serverless backend for Turnstile CAPTCHA challenges. These are the checks websites add to verify the user is not a bot, and so protect forms, for example, from abuse. Turnstile is a CAPTCHA offering from Cloudflare, which does not require users to solve puzzles. This is in contrast to alternatives such as Arkose MetaKey, Google’s reCAPTCHA or hCaptcha. Cloudflare JavaScript code runs code in the browser, which it can use to assess whether the use is a human or bot, and without asking them to count traffic lights.
Like other CAPTCHAs, Cloudflare submits some analysis data from the user browser and responds (to the browser) with code. A second step, run on your site backend, involves submitting the browser response to Cloudflare, along with a secret site key to get Cloudflare's verdict on whether the visitor is a human or bot. We focus on this second step here, which can be useful for static or JAMStack websites.
You might want to read a previous article on getting started with Rust Cloudflare workers, before carrying on, as this post using that, previous, post’s code as a starting point.
🗳 Poll #
⚙️ Project Setup #
In the previous, getting started with Rust Cloudflare workers tutorial, we built up a basic REST API, based on the worker Rust template
. To start, create a new Git branch in your repo from that tutorial or get the code from the Rodney Lab GitHub repo , then runpnpm install in the project directory.
🤖 CAPTCHA API Route #
We will start by adding a new CAPTHCA route to the router code, in src/lib.rs. The code will listen for form submissions sent from the frontend. In a
real world application, that POST request would
contain form field data, filled out by the site visitor, as well as a cf-turnstile-response field. Here, we won’t look at business logic for processing the form inputs,
so just pull that cf-turnstile-response field off
the incoming POST request.
23 #[event(fetch)]24 async fn main(req: Request, env: Env, _ctx: Context) -> Result<Response> {25 log_request(&req);26 let router = Router::new();27 28 router29 .get("/health_check", |_, _| Response::ok("OK"))30 .post_async("/v0/captcha", |mut req, ctx| async move {31 // Read in inputs32 let turnstile_response = match req.form_data().await {33 Ok(value) => {34 // Get `cf-turnstile-response` field if it exists35 }36 Err(_) => {37 return Response::error("Bad request", 400);38 }39 };40 41 // Prepare Turnstile verification HTTP request42 43 44 // Verify and process JSON response45 46 Response::ok("OK")47 })48 .run(req, env)49 .await50 }
We call req.form_data() to pull form fields off
the request. This returns a Rust result , which we match on. If, for example, the request was sent in the wrong
format, and we weren’t able to parse it as form data, we would end up in
the Err arm, and would return a Bad request response.
Assuming the request is well-formed, we next want to try to get the value, for
the cf-turnstile-response field.
32 let turnstile_response = match req.form_data().await {33 Ok(value) => {34 match value.get("cf-turnstile-response") {35 Some(FormEntry::Field(field_value)) => field_value,36 Some(_) => return Response::error("Bad request", 400),37 None => return Response::error("Bad request", 400),38 }39 }40 Err(_) => {41 return Response::error("Bad request", 400);42 }43 }
The form data might be well-formed, but missing the cf-turnstile-response field. Options, in Rust , are used to represent a variable which can have a value of a known type or
an alternative, unexpected or invalid value. value, in the code block above, is the identifier we assigned to the form data,
and calling get on it returns a Rust Option. That
Option will be None, if the cf-turnstile-response is missing. When the field exists, it could be a file or field string value.
We only care about the field value, and anything else (represented by the _ should result in a bad request response).
The code above works just fine, though we can make it a little cleaner using
Rust if let syntax, in place of the inner match:
32 let turnstile_response = match req.form_data().await {33 if let Some(FormEntry::Field(turnstile_response_value)) =34 value.get("cf-turnstile-response")35 {36 turnstile_response_value37 } else {38 return Response::error("Bad request", 400);39 }40 Err(_) => {41 return Response::error("Bad request", 400);42 }43 }
How does that work? Let’s see an example. We get a thermometer reading.
This will be a number (64-bit float) if everything went well. If the
thermometer got unplugged, though, we will get nothing back. Using an option
to represent this, the temperature could be Some(25.0), as an example of a normal reading, or None when
there is no reading for some reason.
let temperature: Option<f64> = get_reading(); if let Some(value) = temperature { console_log!("The temperature is {value} degrees") } else { console_log!("The thermometer broke.") }
For our Some(25.0) example, here, value will be 25.0, and we can print the
temperature. For the None case, we have no need
for value, and just say there is no reading.
Our turnstile example takes it up another level, as we specify we only use the true if value.get("cf-turnstile-response") is Some, and also it is of FormEntry::Field type.
⚽️ Reading Request Headers #
Next, we can, optionally, pass the client IP address to Cloudflare in our
verification request (we look at that request itself in a moment). The IP
address might be included in an HTTP header on the incoming form request to
our API. We can check for the CF-Connecting-IP header
and get its value with:
let client_ip_option = req.headers().get("CF-Connecting-IP").unwrap();
The req.headers().get function call returns a Result, like (req.form_data()). “unwrap” here, is a way of handling the result without pattern matching,
causing a panic in the event of an error.
Pulling it all together, we can build an HTTP request, to send to Turnstile
for the verification result using the reqwest crate:
45 // Prepare Turnstile verification HTTP request46 let client = reqwest::Client::new();47 48 let mut body_form_map = HashMap::<&str, String>::new();49 if let Some(value) = client_ip_option {50 body_form_map.insert("remoteip", value);51 };52 body_form_map.insert("response", turnstile_response);53 body_form_map.insert("secret", turnstile_secret);
To be able to use reqwest, though, we should
add it in Cargo.toml:
16 [dependencies]17 reqwest = { version = "0.11.18", features = ["json"]}18 serde = "1"19 worker = "0.0.17"
Of course, we have only prepared the request, and not sent it! Here is the missing code:
45 // Prepare Turnstile verification HTTP request46 let client = reqwest::Client::new();47 48 let mut body_form_map = HashMap::<&str, String>::new();49 if let Some(value) = client_ip_option {50 body_form_map.insert("remoteip", value);51 };52 body_form_map.insert("response", turnstile_response);53 body_form_map.insert("secret", turnstile_secret);54 55 // Verify and process JSON response56 match client57 .post("https://challenges.cloudflare.com/turnstile/v0/siteverify")58 .form(&body_form_map)59 .send()60 .await61 {62 Ok(value) => match value.json::<TurnstileVerifyResponse>().await {63 Ok(data) => {64 let TurnstileVerifyResponse { success } = data;65 console_log!("Turnstile verified: {success}");66 Ok(Response::ok("OK")?.with_headers(headers))67 }68 Err(_) => Response::error("Bad request", 400),69 },70 Err(_) => Response::error("Bad gateway", 501),71 }72 })73 .run(req, env)74 .await75 }
We are sending the data as POST form request. Naturally,
reqwest supports JSON POST requests as well as GET and other types of
HTTP request .
🤫 Secrets and Environment Variables #
In the previous post, we saw how you can read meta from Cargo.toml, made available as environment variables by Rust. Let’s look a little
more at environment variable handling. Wrangler lets you define variables in
the wrangler.toml file. If you need to store secret
variables, hang on a moment, we will see something designed specifically for secrets
in a moment.
We expect visitors to submit forms from a browser, and so we need to cater for CORS requests . Specifically, our response needs to include the Access-Control-Allow-Origin header. To see an example of storing variables in wrangler.toml, we will add a list of allowed CORS origins there. Update wrangler.toml:
1 name = "worker-rust"2 main = "build/worker/shim.mjs"3 compatibility_date = "2023-03-22"4 5 [vars]6 CORS_ORIGIN = "http://127.0.0.1:3001,https://example.com"7 8 [build]9 command = "cargo install -q worker-build && worker-build --release"
We can then access that parameter from Rust code using:
ctx.var("CORS_ORIGIN")?.to_string()
Secrets #
You can push secrets into your Cloudflare production environment from the Terminal:
pnpm wrangler secret put TURNSTILE_SECRETKEY
However, for local development, use a .dev.vars file in your project root directory:
TURNSTILE_SECRETKEY="0x11111111111_abcdefghijklmnopqrstu"
Then to access this value from your Rust code, use:
ctx.secret("TURNSTILE_SECRETKEY")?.to_string();
🧰 CORS Header Utility Function #
We will add a utility function, before wrapping up with the final version of
the code. You can add this code in src/lib.rs before
the main function:
27 fn cors_response_headers(request_headers: &worker::Headers, cors_origin: &str) -> worker::Headers {28 let mut headers = worker::Headers::new();29 let origin = match request_headers.get("Origin").unwrap() {30 Some(value) => value,31 None => return headers,32 };33 headers34 .set("Access-Control-Allow-Headers", "Content-Type")35 .expect("Unable to set header");36 headers37 .set("Access-Control-Allow-Methods", "POST")38 .expect("Unable to set header");39 headers.set("Vary", "Origin").expect("Unable to set header");40 if cors_origin.split(',').any(|val| val == cors_origin) {41 headers42 .set("Access-Control-Allow-Origin", &origin)43 .expect("Unable to set header");44 }45 headers46 .set("Access-Control-Max-Age", "86400")47 .expect("Unable to set header");48 headers49 }
The CAPTCHA route code will call this function, passing in the request headers
and the comma separated list of allowed CORS origins. The request headers
should include an Origin header, which we can check
against the list of allowed origins.
Two points to note here are:
-
the use of
expectto handle results; and -
the Rust closure in lines
40-44.
expect works like unwrap and causes a panic when the result is not OK. The difference is that it takes
an argument, which gives some feedback if it does panic.
cors_origin.split(',') in line 40 splits a comma separated list, in a string such as "http://127.0.0.1:3001,https://example.com" into a vector of strings like: ["http://127.0.0.1:3001", "https://example.com"] and then returns an iterator over that vector. We can then call the any closure on that value, looking for matches, and return true if there is a match. This functional approach provides a cleaner alternative
than an explicit loop over the vector elements, in this case.
🖥️ Final Router Code #
Pulling everything together, your final version will look something like this:
src/lib.rs — click to expand code.
#[event(fetch)]async fn main(req: Request, env: Env, _ctx: Context) -> Result<Response> { log_request(&req); let router = Router::new(); router .get("/health_check", |_, _| Response::ok("OK")) .options("/v0/captcha", |req, ctx| { let headers = cors_response_headers(req.headers(), &ctx.var("CORS_ORIGIN")?.to_string()); Ok(Response::empty() .unwrap() .with_headers(headers) .with_status(204)) }) .post_async("/v0/captcha", |mut req, ctx| async move { // Read in inputs let client_ip_option = req.headers().get("CF-Connecting-IP").unwrap(); let turnstile_secret = ctx.secret("TURNSTILE_SECRETKEY")?.to_string(); let headers = cors_response_headers(req.headers(), &ctx.var("CORS_ORIGIN")?.to_string()); let turnstile_response = match req.form_data().await { Ok(value) => { if let Some(FormEntry::Field(turnstile_response_value)) = value.get("cf-turnstile-response") { turnstile_response_value } else { return Response::error("Bad request", 400); } } Err(_) => { return Response::error("Bad request", 400); } }; // Prepare Turnstile verification HTTP request let client = reqwest::Client::new(); let mut body_form_map = HashMap::<&str, String>::new(); if let Some(value) = client_ip_option { body_form_map.insert("remoteip", value); }; body_form_map.insert("response", turnstile_response); body_form_map.insert("secret", turnstile_secret); // Verify and process JSON response match client .post("https://challenges.cloudflare.com/turnstile/v0/siteverify") .form(&body_form_map) .send() .await { Ok(value) => match value.json::<TurnstileVerifyResponse>().await { Ok(data) => { let TurnstileVerifyResponse { success } = data; console_log!("Turnstile verified: {success}"); Ok(Response::ok("OK")?.with_headers(headers)) } Err(_) => Response::error("Bad request", 400), }, Err(_) => Response::error("Bad gateway", 501), } }) .run(req, env) .await}
Here, we just put everything together, also adding an extra captcha route, listening for CORS OPTIONS requests.
💯 Rust Cloudflare Workers: Check your Work #

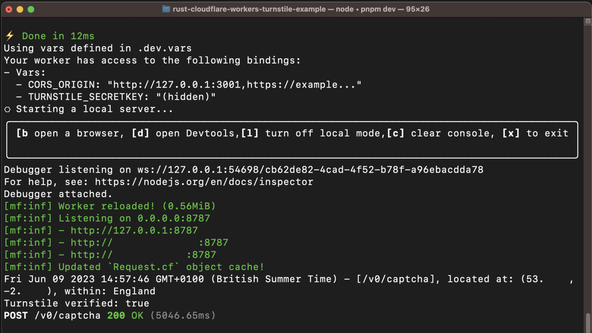
To test this out, you might want to spin up a quick frontend using Deno Fresh or Astro. You will need to configure Turnstile in your Cloudflare account to get a site key and secret key.
🙌🏽 Rust Cloudflare Workers: Wrapping Up #
We continued our exploration of Rust and Cloudflare workers adding new routes to the API. More specifically, we have seen:
- how to parse form data on an incoming HTTP request using Rust Cloudflare workers;
- how to use reqwest to make REST requests to external servers; and
- examples of adding response headers on API endpoints.
The Rust Cloudflare Workers Turnstile Example code is in the Rodney Lab GitHub repo .
I hope you found this article useful, and am keen to hear where you will go next, as well as potential improvements, both to the Rust code and explanations above. Also, let me know if you would like to see another edition in this series, and which feature would be interesting to explore.
🏁 Rust Cloudflare Workers: Summary #
Which Rust crate can you use to send HTTP requests in an API? #
- Reqwest is a fantastic, high-level crate for sending REST requests. It uses async methods, by default, but also offers blocking alternatives. On top, reqwest uses rustls under the hood. With that being a pure Rust TLS implementation, reqwest will work just fine in WASM environments.
What is the difference between Rust unwrap and expect error-handling methods? #
- With expect, you can include an error message to show when the error arm is hit. Both unwrap and expect cause execution to panic, just unwrap has no arguments.
When would you use an Option in Rust? #
- A great example of using an Option in Rust is for representing empirical data, like temperature measurements. You might want to use a single identifier to represent both valid temperature readings and also those where something went wrong. Using a Rust Option, the variable would be `Some(x)` when the reading is valid and `None` otherwise.
🙏🏽 Rust Cloudflare Workers: Feedback #
Have you found the post useful? Would you prefer to see posts on another topic instead? Get in touch with ideas for new posts. Also, if you like my writing style, get in touch if I can write some posts for your company site on a consultancy basis. Read on to find ways to get in touch, further below. If you want to support posts similar to this one and can spare a few dollars, euros or pounds, please consider supporting me through Buy me a Coffee.


Just put together an extension to the Getting Started with 🦀 Rust Cloudflare Workers post.
— Rodney (@askRodney) June 14, 2023
We build out the router seeing how to parse form data, and also make REST requests to external services.
Hope you find it useful!
#learnrust #askRodneyhttps://t.co/4nXdrOgXFx
Finally, feel free to share the post on your social media accounts for all your followers who will find it useful. As well as leaving a comment below, you can get in touch via @askRodney on Twitter and also askRodney on Telegram . Also, see further ways to get in touch with Rodney Lab. I post regularly on Astro as well as SvelteKit. Also, subscribe to the newsletter to keep up-to-date with our latest projects.