


☁️ Using Netlify Functions with SvelteKit #
Why would you want to be using Netlify Functions with SvelteKit instead of the inbuilt SvelteKit functionality? Like Next.js from the React world, SvelteKit supports server side rendering as well as server side routes from which you can run your server side code. There are a couple of reasons that come to mind for using Netlify functions with SvelteKit though. Firstly, if you are migrating your site from another platform and have existing Netlify functions, you can speed up the migration by transplanting over the existing Netlify functions.
Another reason for using Netlify functions in your SvelteKit app is to gain access to other languages in your functions. You can write Netlify functions in Rust among other languages. Using API server routes in SvelteKit, you would be limited to JavaScript. You might choose Rust over JavaScript when performance is critical, as typically you can optimize Rust code to run faster than equivalent JavaScript. The good news is (as we will see in a moment) that besides a couple of configuration files, you don't need much to get your Netlify functions working in tandem with SvelteKit.
🧑🏽🎓 How to Get Started Using Netlify Functions with SvelteKit #
We'll look at these three steps in turn, which will get you using Netlify Functions with SvelteKit in no time:
netlify.tomlconfiguration file,- Netlify adapter,
- create functions.
- why you might want to use Netlify functions with SvelteKit;
- how to configure a Netlify SvelteKit build; and
- how to add Netlify functions to your SvelteKit app.
⚙️ netlify.toml Config File #
netlify.toml Config File #
Create a netlify.toml file in the root directory
of your project and add the following content:
[build] command = "npm run build" publish = "build" [dev] command = "svelte-kit dev" [functions] directory = "netlify/functions" node_bundler = "esbuild"
Probably the most important part here is specifying the directory where we
will put the Netlify functions (netlify/functions).
🔌 Netlify Adapter #
Svelte has build adapters which help customize your site build for your hosting platform. This is exactly what the Netlify adapter does . Part of its work is to convert any server endpoints to Netlify functions. This means your build app will have a render function (generated by the adapter) as well as any Netlify functions you define yourself.
The SvelteKit adapters are still evolving. As such, current best practice is
to choose the next version, which you can install
with pnpm, npm or yarn:
pnpm add -D @sveltejs/adapter-netlify@next
On top, you will need to let SvelteKit know that you want it to use this adapter:
1 /** @type {import('@sveltejs/kit').Config} */2 import adapter from '@sveltejs/adapter-netlify';3 import { mdsvex } from 'mdsvex';4 import preprocess from 'svelte-preprocess';5 6 const config = {7 extensions: ['.svelte', '.md', '.svelte.md'],8 preprocess: [9 mdsvex({ extensions: ['.svelte.md', '.md', '.svx'] }),10 preprocess({11 scss: {12 prependData: "@import 'src/lib/styles/variables.scss';",13 },14 }),15 ],16 kit: {17 adapter: adapter(),18 },19 };20 21 export default config;
Import the adapter to your svelte.config.js file
(line 2) and then set it as SvelteKit's
adapter (line 17).
🗳 Poll #
🖥 The Netlify Functions #
Next, you can create the netlify/functions directory
in your project and add any functions there. You are not limited to JavaScript
here. Have a look at the post on using Rust for Netlify functions to get started with other languages.
Here are a couple of JavaScript test functions you can use to try out your setup. The first can be used to get a client IP. You might need this if you are doing spam detection. The second just returns a JSON object:
exports.handler = async (event, _, callback) => { const ip = event.headers['x-forwarded-for']; const client = ip.split(',')[0]; callback(null, { statusCode: 200, body: client, });};
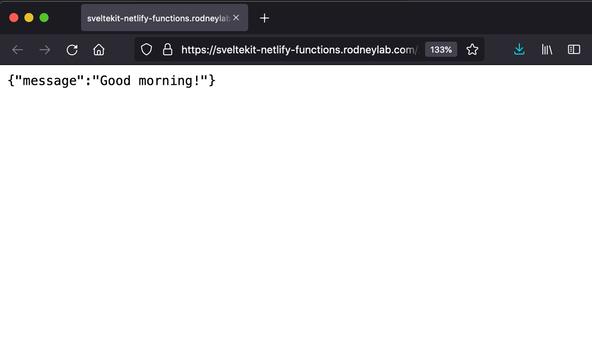
exports.handler = async function () { return { statusCode: 200, body: JSON.stringify({ message: 'Good morning!' }), };};
💯 Testing it out #

In the Netlify tradition, configuration and boilerplate are kept to a
minimum. To get these functions running, you should just need to commit
these changes to your git repository, and deploy as normal. To test the client-ip function, you need to point your browser to the /.netlify/functions/client-ip route (see the working example here: sveltekit-netlify-functions.rodneylab.com/.netlify/functions/client-ip ). Similarly, for the good-morning function,
point your browser to /.netlify/functions/good-morning. Again, there is a live test site at sveltekit-netlify-functions.rodneylab.com/.netlify/functions/good-morning .
I have also created a full working repo on the Rodney Lab GitHub page .
🙌🏽 Wrapup #
In this post, we saw:
If you want to create a static Netlify site for your next project, have a look at the post on SvelteKit static site HTTP headers. This post came from a question left in a comment. So if this post spurs further questions, please do drop a comment below, and I might be able to create more content in response.
We focussed on Netlify functions in this post, though Netlify also offers middleware in the form of Netlify Edge Functions. We try these out in the SvelteKit eCommerce site to keep our Directus Content Management System (CMS) URL private . We also use Edge Functions in the getting started with WordPress tutorial to proxy images. This makes it look like the images are served by our site to the browser. Instead, to serve them from the WordPress site and save ourselves having to copy every new image we add to the SvelteKit frontend site.
🙏🏽 Feedback #
Have you found the post useful? Which other hosting service would you like to know how to host a SvelteKit site on? Would you like to see posts on another topic instead? Get in touch with ideas for new posts. Also, if you like my writing style, get in touch if I can write some posts for your company site on a consultancy basis. Read on to find ways to get in touch, further below. If you want to support posts similar to this one and can spare a few dollars, euros or pounds, please consider supporting me through Buy me a Coffee.
Finally, feel free to share the post on your social media accounts for all your followers who will find it useful. As well as leaving a comment below, you can get in touch via @askRodney on Twitter and also askRodney on Telegram . Also, see further ways to get in touch with Rodney Lab. I post regularly on SvelteKit as well as other topics. Also, subscribe to the newsletter to keep up-to-date with our latest projects.