


😕 Why S3 Compatible Storage? #
In this post on SvelteKit compatible S3 storage, we will take a look at how you can add an upload feature to your Svelte app. We use pre-signed links, allowing you to share private files in a more controlled way. Rather than focus on a specific cloud storage provider's native API, we take an S3 compatible approach. Cloud storage providers like Backblaze, Supabase and Cloudflare R2 offer access via an API compatible with Amazon’s S3 API. The advantage of using an S3 compatible API is flexibility. If you later decide to switch provider, you will be able to keep the bulk of your existing code.
Please enable JavaScript to watch the video 📼
We will build a single page app in SvelteKit which lets the visitor upload a file to your storage bucket. You might use this as a convenient way of uploading files for your projects to the cloud. Alternatively, it can provide a handy starting point for a more interactive app, letting users upload their own content. That might be for a photo sharing app, your own microblogging service, or for an app letting clients preview and provide feedback on your amazing work. I hope this is something you find interesting, if it is, let's get going.
⚙️ Getting Started #
Let start by creating a new skeleton SvelteKit project. Type the following commands in the terminal:
pnpm dlx sv create sveltekit-graphql-github && cd $_pnpm install
We will be using the official AWS SDK for some operations on our S3 compatible cloud storage. As well as the npm packages for the SDK, we will need a few other packages including some fonts for self-hosting. Let’s install all of these now:
pnpm add -D @aws-sdk/client-s3 @aws-sdk/s3-request-presigner \ @aws-sdk/util-create-request @aws-sdk/util-format-url \ @fontsource/libre-franklin @fontsource/rajdhani \ @paralleldrive/cuid2
Initial Authentication #
Although most of the code we look at here should work with any S3 compatible storage provider, the mechanism for initial authentication will be slightly different for each provider. Even taking that into account, it should still make sense to use the provider's S3 compatible API for all other operations to benefit from the flexibility this offers. We focus on Backblaze for initial authentication. Check your own provider’s docs for their mechanism.
To get S3 compatible storage parameters from the Backblaze API, you need to
supply an Account ID and Account Auth token with read and write access to the
bucket we want to use. Let's add these to a .env file together with the name of the bucket (if you already have one set up). Buckets
offer a mechanism for organizing objects (or files) in cloud storage. They play
a role analogous to folders or directories on your computer's file system.
S3_COMPATIBLE_ACCOUNT_ID="your-account-id"S3_COMPATIBLE_ACCOUNT_AUTH_TOKEN="your-auth-token"S3_COMPATIBLE_BUCKET_NAME="your-bucket-name"
Start the dev Server #
Use this command to start the dev server:
pnpm dev
By default, it will run on TCP port 5173. If
you already have something running there, see how you can change server ports in the article on getting started with SvelteKit.
🔗 Pre‑signed URLs #
We will generate pre-signed read and write URLs on the server side. Pre-signed URLs offer a way to limit access, granting temporary access. Links are valid for 15 minutes by default. Potential clients, app users and so on will be able to access just the files you want them to access. Also, because you are using pre-signed URLs, you can keep the access mode on your bucket set to private.
To upload a file, we will use the “write” pre-signed URL. We will also get a read signed URL. We can use that to download the file if we need to.
Let’s create a SvelteKit server endpoint to listen for new pre-signed
URL requests. Create a src/routes/api/presigned-urls.json folder, adding a +server.js file with the following
content:
1 import { presignedUrls } from '$lib/utilities/storage';2 3 export async function POST({ request, setHeaders }) {4 const { key } = await request.json();5 6 try {7 const { readSignedUrl, writeSignedUrl } = await presignedUrls(key);8 9 setHeaders({10 'Content-Type': 'application/json',11 });12 13 return new Response(14 JSON.stringify({15 readSignedUrl,16 writeSignedUrl,17 }),18 );19 } catch (error) {20 const message = `Error in route api/presigned-urls.json: ${error}`;21 console.error(message);22 throw new Error(message);23 }24 }
Utilities #
This endpoint will be called from our client +page.svelte file later. You will see it references a presignedUrls function, which we have not yet defined. Create a src/lit/utilities folder and in there make a storage.js file with this content:
1 import {2 S3_COMPATIBLE_ACCOUNT_AUTH_TOKEN,3 S3_COMPATIBLE_ACCOUNT_ID,4 S3_COMPATIBLE_BUCKET_NAME,5 } from '$env/static/private';6 import { GetObjectCommand, PutObjectCommand, S3 } from '@aws-sdk/client-s3';7 import { S3RequestPresigner } from '@aws-sdk/s3-request-presigner';8 import { createRequest } from '@aws-sdk/util-create-request';9 import { formatUrl } from '@aws-sdk/util-format-url';10 import { createId } from '@paralleldrive/cuid2'; 11 12 async function authoriseAccount() {13 try {14 const authorisationToken = Buffer.from(15 `${S3_COMPATIBLE_ACCOUNT_ID}:${S3_COMPATIBLE_ACCOUNT_AUTH_TOKEN}`,16 'utf-8',17 ).toString('base64');18 19 const response = await fetch('https://api.backblazeb2.com/b2api/v2/b2_authorize_account', {20 method: 'GET',21 headers: {22 Authorization: `Basic ${authorisationToken}`,23 },24 });25 const data = await response.json();26 const {27 absoluteMinimumPartSize,28 authorizationToken,29 apiUrl,30 downloadUrl,31 recommendedPartSize,32 s3ApiUrl,33 } = data;34 return {35 successful: true,36 absoluteMinimumPartSize,37 authorizationToken,38 apiUrl,39 downloadUrl,40 recommendedPartSize,41 s3ApiUrl,42 };43 } catch (error) {44 let message;45 if (error.response) {46 message = `Storage server responded with non 2xx code: ${error.response.data}`;47 } else if (error.request) {48 message = `No storage response received: ${error.request}`;49 } else {50 message = `Error setting up storage response: ${error.message}`;51 }52 return { successful: false, message };53 }54 }
This code works for Backblaze’s API, but will be slightly different if you use another provider. The rest of the code we look at should work with any S3 compatible storage provider.
In lines 1 – 5 we pull the credentials
we stored, earlier, in the .env file. Moving on,
in lines 14 – 17 we see how you can generate a Basic Auth header in JavaScript. Finally, the Backblaze response returns a recommended and minimum
part size. These are useful when uploading large files. Typically, you will want
to split large files into smaller chunks. These numbers give you some guidelines
on how big each of the chunks should be. We look at pre-signed multipart uploads in another article. Most important though is the s3ApiUrl (line 41) which we will need to create a JavaScript S3 client.
Creating Pre‑signed Links with S3 SDK #
Next we use that S3 API URL to get the S3 region and then use that to get the
pre-signed URLs from the SDK. Add this code to the bottom of the storage.js file:
56 function getRegion(s3ApiUrl) {57 return s3ApiUrl.split('.')[1];58 }59 60 function getS3Client({ s3ApiUrl }) {61 const credentials = {62 accessKeyId: S3_COMPATIBLE_ACCOUNT_ID,63 secretAccessKey: S3_COMPATIBLE_ACCOUNT_AUTH_TOKEN,64 sessionToken: `session-${createId()}`,65 };66 67 const S3Client = new S3({68 endpoint: s3ApiUrl,69 region: getRegion(s3ApiUrl),70 credentials,71 });72 return S3Client;73 }74 75 async function generatePresignedUrls({ key, s3ApiUrl }) {76 const Bucket = S3_COMPATIBLE_BUCKET_NAME;77 const Key = key;78 const client = getS3Client({ s3ApiUrl });79 80 const signer = new S3RequestPresigner({ ...client.config });81 const readRequest = await createRequest(client, new GetObjectCommand({ Key, Bucket }));82 const readSignedUrl = formatUrl(await signer.presign(readRequest));83 const writeRequest = await createRequest(client, new PutObjectCommand({ Key, Bucket }));84 const writeSignedUrl = formatUrl(await signer.presign(writeRequest));85 return { readSignedUrl, writeSignedUrl };86 }87 88 export async function presignedUrls(key) {89 try {90 const { s3ApiUrl } = await authoriseAccount();91 const { readSignedUrl, writeSignedUrl } = await generatePresignedUrls({ key, s3ApiUrl });92 return { readSignedUrl, writeSignedUrl };93 } catch (error) {94 console.error(`Error generating pre-signed urls: ${error}`);95 }96 }
In line 64 we use the @paralleldrive/cuid2 package to help us generate a unique (collision resistant) session id. That's
the server side setup. Next let’s look at the client.
🗳 Poll #
🧑🏽 Client Home Page JavaScript #
We’ll split the code into a couple of stages. First, let’s add our script block with the code for interfacing with the endpoint that we just created and also the cloud provider. We get pre-signed URLs from the endpoint then, upload directly to the cloud provider from the client. Since all we need for upload is the pre-signed URL, there is no need to use a server endpoint. This helps us keep the code simpler.
Replace the content of src/routes/+page.svelte with
the following:
1 <script>2 import '$lib/styles/global.css';3 import '@fontsource/rajdhani';4 import '@fontsource/libre-franklin';5 6 const H_ELLIPSIS_ENTITY = '\u2026'; // ...7 const LEFT_DOUBLE_QUOTE_ENTITY = '\u201c'; // "8 const RIGHT_DOUBLE_QUOTE_ENTITY = '\u201d'; // "9 10 let isSubmitting = $state(false);11 let uploadComplete = $state(false);12 let files = $state([]);13 let errors = $state({ files: null });14 let downloadUrl = $state('');15 let filename = $derived(files.length > 0 ? files[0].name : '');16 17 function resetForm() {18 files = [];19 errors = { files: null };20 }21 22 const handleChange = (event) => {23 errors = { files: null, type };24 files = event.target.files;25 };26 27 const handleSubmit = async (event) => {28 event.preventDefault();29 try {30 if (files.length === 0) {31 errors.files = 'Select a file to upload first';32 return;33 }34 35 isSubmitting = true;36 const { name: key } = files[0];37 38 // get signed upload URL39 const response = await fetch('/api/presigned-urls.json', {40 method: 'POST',41 credentials: 'omit',42 headers: {43 'Content-Type': 'application/json',44 },45 body: JSON.stringify({ key }),46 });47 const json = await response.json();48 const { readSignedUrl, writeSignedUrl } = json;49 downdloadUrl = readSignedUrl;50 51 // Upload file52 const reader = new FileReader();53 reader.onloadend = async () => {54 await fetch(writeSignedUrl, {55 method: 'PUT',56 body: reader.result,57 headers: {58 'Content-Type': type,59 },60 });61 uploadComplete = true;62 isSubmitting = false;63 };64 reader.readAsArrayBuffer(files[0]);65 } catch (error) {66 console.log(`Error in handleSubmit on / route: ${error}`);67 }68 };69 </script>
The first part is mostly about setting up the user interface state. There is
nothing unique to this app there, so let’s focus on the handleSubmit function. There are two parts. The first in which we get a signed URL from the
endpoint we just created and the second where we use the FileReader API to upload the file to the cloud.
FileReader API #
The FileReader API lets us read in a file given the local path and output a
binary string, DataURL or an array buffer. You would use a DataURL if you
wanted to Base64 encode an image (for example). You could then set the src of an <img> element to a generated
Base64 data uri string, or upload the image to a Cloudflare worker for processing.
For our use case, uploading files to cloud storage, instead we go for the readAsArrayBuffer option.
The API is asynchronous, so we can just tell it what we want to do once the
file is uploaded and carry on living our life in the meantime! We create an
instance of the API in line 52. Using onloadend we specify that we want to use fetch to upload our file to the cloud, once it
is loaded into an array buffer (from the local file system). In line 64 (after the onreadend block), we specify what
we want to read. The file actually comes from a file input, which we will add in
a moment.
Fetch Request #
The fetch request is inside the onloadend block.
We make a PUT request, including the file type in
a header. The body of the request is the result of the file read from the FileReader
API. Because we are making a PUT request, from the browser, and also because the
content type may not be text/plain, we will
need some CORS configuration. We'll look at that before we finish.
How do we get the file name and type? When the user selects a file, from the
file input we just mentioned, the handleChange code
in lines 22 – 25 runs. This gets the
file, by updating the files variable, but does not
read the file in (that happens in our FileReader API code). Next, when the user
clicks the Upload button which triggers the handleSubmit function call, we get the name and file content type in line 36.
🖥 Client Home Page Markup #
Next we'll add the markup, including the file browse input which lets the user select a file to upload. After that, we'll add some optional styling, look at CORS rules and finally test.
Paste this code at the bottom of the +page.svelte file:
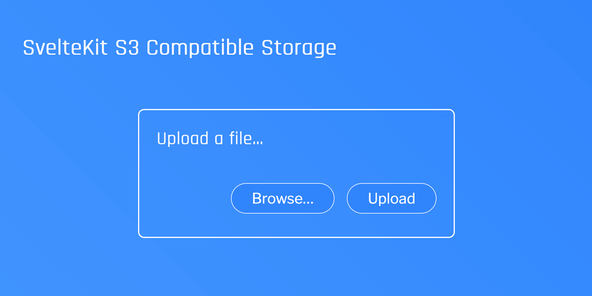
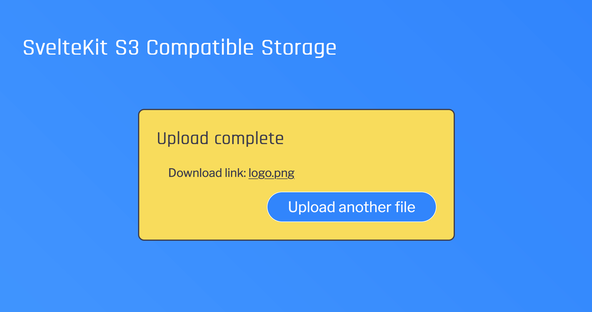
69 <svelte:head>70 <title>SvelteKit S3 Compatible Storage</title>71 <meta72 name="description"73 content="Upload a file to third party storage using an S3 compatible API in SvelteKit."74 />75 </svelte:head>76 77 <main class="container">78 <h1>SvelteKit S3 Compatible Storage</h1>79 {#if uploadComplete}80 <section class="upload-complete">81 <h2 class="heading">Upload complete</h2>82 <p class="filename">83 Download link: <a aria-label={`Download ${filename}`} href={downdloadUrl}>{filename}</a>84 </p>85 <div class="button-container">86 <button87 class="another-upload-button"88 on:click={() => {89 uploadComplete = false;90 resetForm();91 }}>Upload another file</button92 >93 </div>94 </section>95 {:else}96 <section class="upload">97 <form onsubmit={handleSubmit}>98 <h2 class="heading">Upload a file{H_ELLIPSIS_ENTITY}</h2>99 {#if filename !== ''}100 <p class="filename">{filename}</p>101 <p class="filename">102 Click {LEFT_DOUBLE_QUOTE_ENTITY}Upload{RIGHT_DOUBLE_QUOTE_ENTITY} to start upload.103 </p>104 {/if}105 {#if errors.files}106 <div class="error-text-container">107 <small id="files-error" class="error-text">{errors.files}</small>108 </div>109 {/if}110 {#if isSubmitting}111 <small id="files-error">Uploading{H_ELLIPSIS_ENTITY}</small>112 {/if}113 <div class="file-input-container">114 <label class="file-input-label" for="file"115 ><span class="screen-reader-text">Find a file to upload</span></label116 >117 <input118 id="file"119 aria-invalid={errors.files != null}120 aria-describedby={errors.files != null ? 'files-error' : null}121 type="file"122 multiple123 formenctype="multipart/form-data"124 accept="image/*"125 title="File"126 onchange={handleChange}127 />128 <div class="button-container">129 <button type="submit" disabled={isSubmitting}>Upload</button>130 </div>131 </div>132 </form>133 </section>134 {/if}135 </main>
You can see the file input code in lines 117 – 129. We have set the
input to allow the user to select multiple files ( multiple attribute in line 122). For simplicity, the
logic we added previously only uploads the first file, though you can tweak it
if you need multiple uploads from your application. In line 124 we set the input to accept only image files with accept="image/*". This can be helpful for user experience, as typically in the file select
user interface, just image files will be highlighted. You can change this to
accept just a certain image format or different file types, like PDF, or video
formats — whatever your application needs. See more on file type specifier in the MDN docs .

Finally, before we check out CORS, here's some optional styling. This can be nice to add as the default HTML file input does not look a little brutalist!
src/routes/+page.svelte — click to expand code.
138 <style>139 .screen-reader-text {140 border: 0;141 clip: rect(1px, 1px, 1px, 1px);142 clip-path: inset(50%);143 height: 1px;144 margin: -1px;145 width: 1px;146 overflow: hidden;147 position: absolute !important;148 word-wrap: normal !important;149 }150 .error-text-container {151 margin: 2rem 0 0.5rem;152 }153 .error-text {154 color: var(--colour-feature);155 background-color: var(--colour-dark);156 padding: 0.5rem 1.25rem;157 border-radius: 1.5rem;158 border: solid 0.0625rem var(--colour-feature);159 }160 161 .container {162 margin: 1.5rem;163 min-height: 100vh;164 }165 166 .container h1 {167 font-family: Rajdhani;168 font-size: 1.953rem;169 }170 171 .upload,172 .upload-complete {173 margin: 4rem 1rem;174 padding: 1.5rem;175 border: solid 0.125rem var(--colour-light);176 border-radius: 0.5rem;177 }178 179 .button-container {180 display: flex;181 }182 183 :is(.upload, .upload-complete) .heading {184 font-family: Rajdhani;185 font-size: 1.563rem;186 margin-top: 0;187 }188 189 .upload-complete {190 background-color: var(--colour-feature);191 color: var(--colour-dark);192 border-color: var(--colour-dark);193 }194 .filename {195 margin-left: 1rem;196 }197 198 .filename a {199 color: var(--colour-dark);200 text-underline-offset: 0.125rem;201 }202 203 .file-input-container {204 display: flex;205 align-items: center;206 justify-content: flex-end;207 padding: 1.5rem 0 0.5rem;208 }209 210 .file-input-label::before {211 content: 'Browse…';212 margin-left: auto;213 }214 215 .file-input-label::before,216 button {217 font-family: Libre Franklin;218 background: var(--colour-theme);219 cursor: pointer;220 color: var(--colour-light);221 border: solid 0.0625rem var(--colour-light);222 border-radius: 1.5rem;223 margin-left: 1rem;224 padding: 0.5rem 1.75rem;225 font-size: 1.25rem;226 font-weight: var(--font-weight-medium);227 }228 229 @media (prefers-reduced-motion: no-preference) {230 .file-input-label::before,231 button {232 transition: background-color 250ms, color 250ms;233 }234 }235 @media (prefers-reduced-motion: no-preference) {236 .file-input-label::before,237 button {238 transition: background-color 2000ms, color 2000ms;239 }240 }241 242 button:hover,243 .file-input-label:hover:before,244 button:focus,245 .file-input-label:focus:before {246 background-color: var(--colour-light-opacity-85);247 color: var(--colour-dark);248 }249 250 .another-upload-button {251 margin-left: auto;252 }253 254 .upload-complete button:hover,255 .upload-complete button:focus {256 border-color: var(--colour-dark);257 }258 259 input[type='file'] {260 visibility: hidden;261 width: 1px;262 }263 264 @media (min-width: 768px) {265 .container {266 margin: 3rem 1.5rem;267 }268 269 .upload,270 .upload-complete {271 margin: 4rem 10rem;272 }273 }274 </style>
src/lib/styles/global.css — click to expand code.
1 html {2 background-image: linear-gradient(3 to top right,4 var(--colour-theme-lighten-20),5 var(--colour-theme)6 );7 color: var(--colour-light);8 9 font-family: Libre Franklin;10 }11 12 :root {13 --colour-theme: #3185fc; /* azure */14 --colour-theme-lighten-20: #4599ff;15 --colour-light: #fafaff; /* ghost white */16 --colour-light-opacity-85: #fafaffd9;17 --colour-dark: #403f4c; /* dark liver */18 --colour-feature: #f9dc5c; /* naples yellow */19 --colour-alternative: #e84855; /* red crayola */20 --font-weight-medium: 500;21 }
⛔ Cross‑origin Resource Sharing (CORS) #
CORS rules are a browser security feature which limit what can be sent to a
different origin. By origin, we mean sending data to example-b.com when you
are on the example-a.com site. If the request to a cross-origin does not meet
some basic criteria GET request or POST with text/plain content type, for example, the
browser will perform some extra checks. We send a PUT request from our code, so the browser will send a so-called preflight request ahead of the actual request. This just checks with the site we are sending the
data to what it is expecting us to send, or rather what it will accept.
To avoid CORS issues, we can set CORS rules with our storage provider. It is possible to set them on your bucket when you create it. Check with your provider on the mechanism for this. With Backblaze, you can set CORS rules using the b2 command line utility in JSON format. Here is an example file:
1 [2 {3 "corsRuleName": "development",4 "allowedOrigins": ["https://test.localhost.com:5173"],5 "allowedHeaders": ["content-type", "range"],6 "allowedOperations": ["s3_put"],7 "exposeHeaders": ["x-amz-version-id"],8 "maxAgeSeconds": 3009 },10 {11 "corsRuleName": "production",12 "allowedOrigins": ["https://example.com"],13 "allowedHeaders": ["content-type", "range"],14 "allowedOperations": ["s3_put"],15 "exposeHeaders": ["x-amz-version-id"],16 "maxAgeSeconds": 360017 }18 ]
We can set separate rules to let our dev and production requests work. In the allowed origin for dev, we set a dummy hostname instead of localhost and on top we run in HTTPS mode. You may be able to have everything working without this setup, but try it if you have issues. Add this CORS configuration to Backblaze with the CLI utility installed by running:
b2 update-bucket --corsRules "$(cat backblaze-bucket-cors-rules.json)" your-bucket-name allPrivate
You can see more on Backblaze CORS rules in their documentation .
Secure dev Server #
Vite recommends creating your own SSL certificates to run a local dev server
in HTTPS mode. If you do not have these already, to test your code, you might
opt for installing the @vitejs/plugin-basic-ssl package, then updating vite.config.js to use
it:
1 import { sveltekit } from '@sveltejs/kit/vite';2 import basicSsl from '@vitejs/plugin-basic-ssl';3 4 /** @type {import('vite').UserConfig} */5 const config = {6 plugins: [basicSsl(), sveltekit()],7 };8 9 export default config;
Learn more about this in the video on running a secure SvelteKit dev server .
To set a local hostname on macOS, add a line to private/etc/hosts:
1 127.0.0.1 test.localhost.com
Then, instead of accessing the site via http://localhost:5173, in your browser use https://test.localhost.com:5173. This worked for me on macOS. The same will work on typical Linux and Unix
systems, though the file you change will be /etc/hosts. If you are using DNSCrypt Proxy or Unbound, you can make a similar change
in the relevant config files. If you use Windows and know how to do this,
please drop a comment below to help out other Windows users.
💯 SvelteKit S3 Compatible Storage: Test #
Try uploading a file using the new app. Also make sure the download link works.

🙌🏽 SvelteKit S3 Compatible Storage: What we Learned #
In this post we learned:
- why you would use the S3 compatible API for cloud storage instead of your storage provider's native API,
- how to use the AWS SDK to generate a pre-signed upload URL,
- a way to structure a file upload feature in a SvelteKit app.
I do hope there is at least one thing in this article which you can use in your work or a side project. As an extension, you might want to pull a bucket list and display all files in the folder. You could even add options to delete files. On top, you could also calculate a hash of the file before upload and compare that to the hash generated by your storage provider. This avails a method to verify file integrity. There's a world of different apps you can add an upload feature to; knock yourself out!
You can see the full code for this SvelteKit S3 compatible storage project on the Rodney Lab Git Hub repo .
🏁 SvelteKit S3 Compatible Storage: Summary #
What is S3 compatible storage? #
- AWS offer a cloud storage service called S3. The S3 API can be used to access storage on most other providers. Using this S3 API lets you store and retrieve your data from any of these providers, in a uniform way. Doing so gives you some flexibility, making it easier to change storage provider at a later date.
Why use a pre-signed URL? #
- A pre-signed URL offers a mechanism for granting temporary access to private files in your storage bucket on a per-file basis. Using pre-signed URLs, you can let your clients or site visitors download files from your private bucket.
How can you upload files to cloud storage in SvelteKit? #
- The easiest way is to use the HTML5 FileReader API. We saw how to do that from the browser on the client side of your SvelteKit app in this post. We also saw how to configure CORS for your bucket.
🙏🏽 SvelteKit S3 Compatible Storage: Feedback #
Have you found the post useful? Would you prefer to see posts on another topic instead? Get in touch with ideas for new posts. Also, if you like my writing style, get in touch if I can write some posts for your company site on a consultancy basis. Read on to find ways to get in touch, further below. If you want to support posts similar to this one and can spare a few dollars, euros or pounds, please consider supporting me through Buy me a Coffee.
Finally, feel free to share the post on your social media accounts for all your followers who will find it useful. As well as leaving a comment below, you can get in touch via @askRodney on Twitter and also askRodney on Telegram . Also, see further ways to get in touch with Rodney Lab. I post regularly on SvelteKit as well as other topics. Also, subscribe to the newsletter to keep up-to-date with our latest projects.