


❤️ Svelte and SvelteKit #
It is pretty unlikely that you haven’t heard of Svelte, with all the hype that has surrounded it recently. In fact, Svelte scored top with 96% satisfaction in the State of JavaScript 2021. The Svelte philosophy is one of simplicity. That is clearer nowhere else than in the code for a Svelte site. Unlike for React and some other libraries, it compiles to plain JavaScript. User browsers do not have to interpret Svelte code when they load a page; the page will already be in a language they understand: JavaScript. As a result, Svelte sites are fast by default! You will find this post useful if you are getting started with SvelteKit. Included are 10 tips to get you building fast apps quicker.
Compilation to JavaScript aside, there are a lot of similarities between Svelte and React, flattening the learning curve for anyone coming from React. On top, Vue modelled its API on Sapper (SvelteKit's older brother) so even Vue developers will be straight to the races when trying out Svelte. Want to see what all the buzz is about? Read on to find out how to learn Svelte and also some key tips for getting started with SvelteKit.
👨🏽🎓 How do you get started with Svelte? #
Svelte have written an excellent set of tutorials . These cover quite a bit of ground and take some time to complete. Depending on how you like to learn, I would run with the tutorials until you have covered the basics and then jump to building your own toy apps and take it from there. You will probably need to dip into the tutorials again to understand features such as Stores and Special Elements, which come later on. However, by no means do you have to complete the tutorials to write your first app.
As well as those tutorials, there is also the Starting out Svelte and SvelteKit tutorial . In that tutorial, you build out a real world app, while getting to learn not just the basics plus Stores, but also Svelte’s newest features like style directives and local constants. If you want yet more ideas for getting started with SvelteKit, try Colby Fayock's e-book of 50 React Projects (using Svelte instead of React).
One further route into Svelte, is to build a project in Astro, using frameworks you are already familiar with. On top of partial hydration and islands architecture, another fantastic feature of Astro is that you can build different components in different frameworks. So to learn Svelte you could start with a basic component on your Astro app written in plain HTML and JavaScript or React and convert it to use Svelte. Then, once you are happy with that component and have built your first Svelte component, continue converting other components to Svelte.
🧱 How do you create a Skeleton SvelteKit app? #
Before looking at how to create a SvelteKit app, let’s quickly look at what SvelteKit is. In essence, SvelteKit is a tool for taking your Svelte code and converting it into a packaged app. Svelte is the underlying language, while SvelteKit is a tool for building sites with it. SvelteKit brings server-side rendering (SSR) and code-splitting to your app, though you can also create static apps with SvelteKit. The Svelte/SvelteKit relationship is not all that different to that between React and Next.js.
With that out of the way, let’s look at how to get stared with creating a SvelteKit app.
Please enable JavaScript to watch the video 📼
To get going, you will need to have node installed on your machine . If you are already running Next.js, Remix or Astro, then you probably have everything you need. Now, run the following commands:
pnpm dlx sv create my-new-sveltekit-app && cd $_pnpm installpnpm dev
Choose the SvelteKit minimal option for a quick start. Next, you have some choices over whether your project will use JavaScript or TypeScript. As well as those two, there is a third option, which is Type-checked JavaScript. If you are not a TypeScript fan, consider Type-checked JavaScript, which lets you write types in JSDoc comments. Although you don't go all-in on TypeScript here, you still get some TypeScript advantages, like intellisense. Other options include adding ESLint for code linting and Prettier for code formatting, as well as Playwright for browser testing.
It literally only takes about 40 seconds to download everything you need
and start up your local server. Next, open up your browser and go to http://localhost:5173. If you already have a process running on TCP port 5173, see the tip below on changing the default SvelteKit dev server port.
🧐 Getting Started with SvelteKit: What’s Inside? #
We'll have a quick run through what files and folders we have and some that it's worth creating. Skip onto the next section if you are already familiar with the structure.
.├── README.md├── jsconfig.json├── node_modules│ ├── ...│ └── ...├── package.json├── pnpm-lock.yaml.json├── src│ ├── app.d.ts│ ├── app.html│ ├── lib│ └── routes│ └── +page.svelte├── static│ └── favicon.png├── svelte.config.js└── vite.config.js
-
The
README.mdfile contains some tips on getting going, handy to keep, while you are still getting used to SvelteKit. -
jsconfig.jsondefines some paths which the compiler needs (note that this will betsconfig.jsoninstead if you opted for TypeScript). -
package.json: remember you will find the npm script definitions here so, you can check back on the build, dev and preview commands if you have as bad a memory as I do. We'll look at some scripts you might want to modify inpackage.jsonfurther down. -
src/app.htmlis an HTML template, which SvelteKit injects your code into. You can set some accessibility properties here, or alternatively hang on, and you will see a way to set meta tags programmatically, further down. -
src/app.d.ts: if you're a TypeScript person, you might want to define some global types in here! -
src/lib: create this directory and use it to store your own components, utility functions etc. SvelteKit has a nice way of importing files from here, so you don’t need to use../../../../file-i-want.jsnotation, which can become burdensome when refactoring code. We go into this later. -
src/routes: SvelteKit creates app pages based on the folder structure here. This is a little different to how Next.js, Remix or Astro experience. In short, the folder name containing a+page.sveltefiles matches the route for that page. -
static: by default this directory contains a Svelte favicon, replace that with your own favicon. Also use this directory for logos and other assets which you do not need SvelteKit to generate at compile time (such as PGP public keys) in here. -
svelte.config.jsdoes what is days on the tin! We will drill into a couple of options below.vite.config.jslets you set some option and add plugins for Vite, the tooling under the SvelteKit hood. -
In general, to use environment variables in SvelteKit. First, define
them in a
.envfile:PUBLIC_(you will omit this prefix for server side secrets). -
To use the variables in a file, just import them like so:
What is SvelteKit? #
- SvelteKit is a tool for building sites and web apps coded in Svelte. SvelteKit is kind of a NextJS for Svelte. SvelteKit uses modern Vite tooling to create your app. It can generate server-side rendered sites or static ones. On top, you can decide only to create certain pages as static ones. SvelteKit uses ES Modules by default, which helps with code splitting and hot module reloading. This gives SvelteKit a fast developer experience, while Svelte itself creates a fast user experience.
Is SvelteKit already suitable for production sites? #
- Yes! SvelteKit is now out of beta and version 1.0 has been released. You will find SvelteKit on production sites for many well-known brands.
Why use SvelteKit when you can have Svelte components in Astro? #
- While SvelteKit is written by the Svelte maintainers, Astro embraces the Svelte simplicity principles. It supports partial hydration which speeds up page load, offering visitors a better user experience. On top, the islands of interactivity model used by Astro lets you have more control over how your page loads. As well as this, Astro’s approach to routing closer resembles Remix, Node Fresh or NextJS. That means you might find Astro easier to learn for building your first Svelte app, if you are already familiar with those tools. Finally, Astro lets you combine Svelte with other languages, so might be a good starting point for you to dip a toe in the Svelte pool. If you need a server side rendered app, SvelteKit will be the better choice, and Astro is optimized for content focussed sites.
Does SvelteKit support Hybrid Rendering? #
- Hybrid Rendering is a feature which enables you to create both static (SSG or Static Site Generated) pages and dynamic, SSR (Server-Side Rendered) pages in a single app. This can be useful when building content or information sites. As an example, a blog site with a contact form. The static model will likely suit the blog post pages when the individual pages do not need to be updated frequently and display the same content to all visitors. However, the contact form might benefit from being server-side rendered both for user and developer experience. Opting for a Hybrid Rendering approach suits this kind of site, instead of trying to force all pages either to be SSG or SSR. SvelteKit supports this approach. Astro 2.0 also shipped with hybrid rendering.
Up next, it’s the 10 tips for getting started with SvelteKit.
10 Tips for Getting Started with Svelte #
With the preliminaries out of the way, let's look at some SvelteKit details. Here is a list of 10 tips you should find handy if you are new to SvelteKit.
1: Changing the Default Dev and Preview Server Ports #
The SvelteKit dev server runs on port 5173 locally
by default, while the preview server uses 4173. You can change these in your Svelte project config if you prefer to go
with something else. Just update your vite.config.js file:
import { sveltekit } from '@sveltejs/kit/vite';/** @type {import('vite').UserConfig} */const config = { plugins: [sveltekit()], server: { port: 3000, strictPort: false, }, preview: { port: 4000, strictPort: false, },};export default config;
Here, we change the default port to 3000 for the
dev server and 4000 for the preview server. Here’s
a video which takes you through changing SvelteKit dev and preview server ports in a little more detail.
2: Getting Started with SvelteKit: SvelteKit Tooling #


If you are using VS Code, it is worth installing Svelte for VS Code . This will give you syntax highlighting and completion options (intellisense). This is something you can just set and forget. The extension is the official one, developed by Svelte.
3: SvelteKit Accessibility #
To make your app accessible, it is important that the HTML document includes
a title and the language. The lang attribute is helpful for Screen Readers
to choose the best pronunciation. You can set the lang attribute in app.html:
1 <!DOCTYPE html>2 <html lang="en-GB">3 <head>4 <meta charset="utf-8" />5 <link rel="icon" href="%sveltekit.assets%/favicon.png" />6 <meta name="viewport" content="width=device-width, initial-scale=1" />7 %sveltekit.head%8 </head>9 <body>10 <div>%sveltekit.body%</div>11 </body>12 </html>
4: Getting Started with SvelteKit: SvelteKit Layouts #
You will probably already be familiar with layouts if you have previously
built an Astro or Deno Fresh site. Basically they save you having manually
to add repeated content, like headers and footers, to every single page they
need to appear on. In SvelteKit, if you create a file with the path src/routes/+layout.svelte, this is automatically interpreted as the default layout for your app. In
that file you define your layout (e.g. header and footer) and just need to
include a <slot /> element. This is
where the content from whichever page is using the layout goes:
1 <header>2 <nav>3 <a href="/.">Home</a>4 <a href="/contact">Contact</a>5 </nav>6 </header>7 <main>8 <slot />9 </main>10 <footer>11 <p>12 A project by13 <a14 aria-label="Open the Rodney Lab site"15 href="https://rodneylab.com/"16 target="_blank"17 rel="nofollow noopener noreferrer"18 >RODNEY LAB</a19 >.20 </p>21 </footer>
That’s all you need. Save the file and navigate to the home page. You will see you now have a header and footer. For clarity, you don’t need to change code in any pages using the layout. They will pick it up automatically.
Remember to use semantic HTML (e.g. <header>, <main>, <footer> etc.) where possible to keep the app accessible.
5: Getting Started with SvelteKit: SvelteKit 404 Page #
Similar to the default layout, include a default 404 page but creating a
file with the path src/routes/+error.svelte:
<script> import { page } from '$app/stores'; const { status, error: { message }, } = $page; const title = `${status}: ${message}`;</script> <svelte:head> <title>{title}</title></svelte:head><h1>{title}</h1>
We’re halfway through the tips now. Hope you have learned a couple of handy bits already. There’s more on SEO and environment variables coming up.
6: Importing JSON #
SvelteKit uses Vite under the hood, which makes importing JSON files straight into your Svelte source files a walk in the park. You can import the entire JSON file using a default import. As well as the entire file, you can just import top level items from the JSON file as named imports.
Let’s say we have a JSON file which looks like this:
{ "talks": [ { "speaker": "Blake Shakespeare", "title": "Moving your React site to SvelteKit", "date": "Friday, 6pm", "abstract": "Learn from my experience in transitioning my site from React to SvelteKit: what I got right, what I would do differently going forward.", }, { "speaker": "River Costa", "title": "Building out a GraphQL API in Svelte using Prisma and Supabase", "date": "Saturday, 7pm", "abstract": "See just how easy it can be to write an API using a modern framework and tooling. I take you through step by step from pnpm init to production ready product. The future is SvelteKit!", } ], "ticketsPrices": [ { "type": "regular", "price": "USD 25" }, { "type": "vip", "price": "USD 50" } ]}
Then, we can import talks or ticketPrices as named imports, right from our JSON file:
<script> import { talks, ticketPrices } from "$lib/data/clientsSponsors.json"; const regularTicketPrice = ticketPrices.find( ({ type }) => type === "regular" ).price; // ... TRUNCATED</script>
For more on this, see the video on SvelteKit JSON Imports. By the way, Vite tooling also makes glob imports possible. For example:
const mdModules = await import.meta.glob('../lib/posts/*.md');
7: Environment Variables in SvelteKit #
Environment variables provide a convenient way to store API keys and other private information which we do not want to keep in our repo. There will be some environment variables which you want the user’s browser (client-side) to have access to. You might have an API site key which is needed on the client side to identify your site to a service. Beyond client environment variables, you will possibly have secret environment variables which only the server has access to. API secret keys, used to authenticate your site to a service, are included in this category. SvelteKit can handle both types easily. For secret, server side API keys Scott Spence has written a fantastic article explaining the process. We will focus on client side secrets here.
There is no need to install any external packages.
How to use Environment Variables in SvelteKit #
Using Secret Environment Variables #
You can use secret environment variables (like API keys) in files which just run on the server:
import { SUPER_SECRET_API_KEY } from '$env/static/private'; export function performApiAction() { const apiInstance = initialiseApi({key: SUPER_SECRET_API_KEY}); }
8: Where do you put your Favicon in SvelteKit? #
By default, the assets folder for static files is static/ at the project root. Put any files which SvelteKit does not need to process
in here (e.g. small logo files and public PGP keys). You will need to create the
folder if you selected a skeleton project when you initialized the app. You can
also add the manifest.json file for a Progressive Web App (PWA) here. Don’t forget to as <link> tags in src/app.html. If you want to
generate your favicon files locally using open source tools, see the post on creating the five favicon files needed for wide support in modern and legacy browsers.
9: Getting Started with SvelteKit: Using your Components in Pages #
For convenience, I create the src/lib/components folder for SvelteKit for placing components in. As previously mentioned, another
of the developer experience tweaks in SvelteKit saves you having to work out and
then type out the relative path from the page you are editing to the components
folder. The src/lib folder is accessible throughout
the project, just using $lib. Here is an
example for importing an SEO component with path
src/lib/components/SEO.svelte, used on the
home page:
1 <script>2 import SEO from '$lib/components/SEO/index.svelte';3 4 let title = 'my-svelte-kit-app | Home';5 let metadescription = 'my-svelte-kit-app - my first ever SvelteKit app';6 </script>7 <SEO {title} {metadescription} />8 9 <h1>Welcome to my SvelteKit site</h1>10 <p>It is not too difficult to get started with SvelteKit...</p>
Note in line 7 we use a shortcut syntax (another
developer experience perk in Svelte). This is equivalent to writing:
<SEO title={title} metadescription={metadescription} />
You might want to share components between different SvelteKit projects. SvelteKit also makes this easy with the package command. Check out the post on creating a SvelteKit component library to see how you can share code between SvelteKit projects.
10: Getting Started with SvelteKit: SvelteKit SEO #
Finally, our last tip on getting started with SvelteKit. Like for Astro, adding SEO meta tags in SvelteKit is quite easy. In the case of SvelteKit, following the Svelte philosophy of simplicity, we have already seen that you don't even need to install any extra packages to update the HTML head section. We'll look at some example code, so exactly you can see how to do it.
For a decent sized app, you would probably want to create separate SEO components for Twitter, OpenGraph (used principally for Facebook but also for What's App and others) and Schema.org (used mainly by search engines to serve rich results). Here I have a principal SEO file which imports the other mentioned SEO components:
<script> import OpenGraph from './OpenGraph.svelte'; import SchemaOrg from './SchemaOrg.svelte'; import Twitter from './Twitter.svelte'; import website from '$lib/config/website.js'; import { VERTICAL_LINE_ENTITY } from '$lib/constants/entities.js'; export let title; export let metadescription; const { author, ogLanguage, siteLanguage, siteTitle, siteTitleAlt } = website; const siteUrl = import.meta.env.PUBLIC_SITE_URL; const pageTitle = `${siteTitle} ${VERTICAL_LINE_ENTITY} ${title}`; const openGraphProps = { facebookAppId: import..meta.env.PUBLIC_FACEBOOK_APP_ID, image, metadescription, ogLanguage, pageTitle, siteTitle, siteUrl }; const schemaOrgProps = { author, siteLanguage, siteTitle, siteTitleAlt, siteUrl }; const twitterProps = { author, twitterUsername: import..meta.env.PUBLIC_TWITTER_USERNAME, metadescription, pageTitle, siteUrl };</script><svelte:head> <title>{pageTitle}</title> <meta name="description" content={metadescription} /> <meta name="robots" content="index, follow, max-snippet:-1, max-image-preview:large, max-video-preview:-1" /> <html lang={siteLanguage} /> <SchemaOrg {...schemaOrgProps} /> <OpenGraph {...openGraphProps} /> <Twitter {...twitterProps} /></svelte:head>
As mentioned earlier, to add elements to the output HTML head, we just wrap
them in a <svelte:head> tag. Here, we
have the accessibility lang and title elements defined within our SEO component. As well as those, we have a robots tag which tells search engines we are happy for them to index the page. The
Twitter and OpenGraph components work similarly, so we won’t look at those
here. For a deeper dive into SvelteKit SEO, have a look at the series of posts
dedicated to Search Engine Optimization in SvelteKit.
Schema.org #
Because of the way in which we need to define Schema.org in the HTML
document, we need to tweak the code a little. This is partly so that Svelte
compiles it as intended, but also to stop ESLint breaking the code (albeit
with good intentions). Schema.org metadata is included as a script of type application/ld+json. We create this tag in a few stages. Have a look through the code, then
see the explanation below:
<script> import hash from 'object-hash'; export let author; export let siteLanguage; export let siteTitle; export let siteTitleAlt; export let siteUrl; const entityHash = hash({ author }, { algorithm: 'md5' }); const schemaOrgWebsite = { '@type': 'WebSite', '@id': `${siteUrl}/#website`, url: siteUrl, name: siteTitle, description: siteTitleAlt, publisher: { '@id': `${siteUrl}/#/schema/person/${entityHash}` }, potentialAction: [ { '@type': 'SearchAction', target: `${siteUrl}/?s={query}`, query: 'required' } ], inLanguage: siteLanguage }; const schemaOrgArray = [schemaOrgWebsite]; const schemaOrgObject = { '@context': 'https://schema.org', '@graph': schemaOrgArray }; let jsonLdString = JSON.stringify(schemaOrgObject); let jsonLdScript = ` <script type="application/ld+json"> ${jsonLdString} ${'<'}/script> `;</script><svelte:head> {@html jsonLdScript}</svelte:head>
Let’s start at the bottom and work our way up. In lines 40–42 we add the script to the HTML head. The
@html in line 41 is important for the correct compilation of our Svelte code. In lines 33–37 we define the script tag which we inject
into the DOM at the end of the file. The funkiness, in line 36, is the workaround I mentioned to prevent ESLint from messing up the
code. What we need to output is simply </script>, but to stop ESLint in its tracks, we wrap the opening angular bracket
using the interpolated template variable syntax.
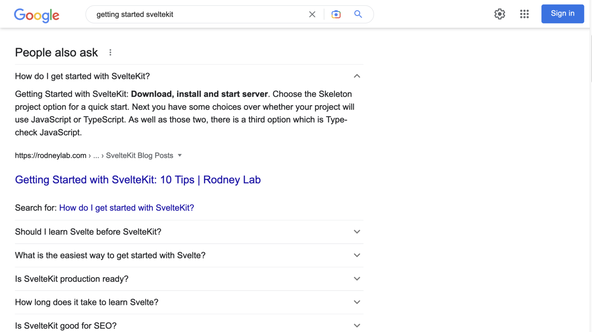
The rest of the file defines the Schema.org data as a JSON object. I have trimmed this down, for simplicity. Normally you will include further fields in the object, such as a breadcrumb list and details on the publishing entity. Again, let me know if you would value a post on this with a full example. SchemaOrg is quite good for SEO, as an example, if you include the right meta, your page will appear like this, above all other results:

All Good Things Must Come to an End! #
That's all for now on getting started with SvelteKit. If you have found this post useful, you should also look at the follow-up post on using Netlify to host your SvelteKit site. Did you learn at least one thing here? Is there anything I should have added. Or even, anything that I did include but was so obvious that I shouldn't have bothered? Please let me know either way. I also want to know how you are finding SvelteKit. Which libraries or frameworks are you more used to? Do you use Netlify? Let me know if you would find a post on using Netlify with SvelteKit and the Netlify adapter. Finally, what have you built so far in SvelteKit?
🏁 Getting Started with SvelteKit: Summary #
🙏🏽 Feedback #
How did you find this guide on getting started with SvelteKit? It's a little different to other posts I have written. Normally I like to work on a single project and build out a complete working example. The idea is to see how everything fits together. Once that is clear, it is easier to take components out and use them in your own projects. How did you find this format? Would you like to see some complete examples using SvelteKit? Keen to hear your views and also learn where your pain points with learning SvelteKit are. If you have found this post useful and can afford even a small contribution, please consider supporting me through Buy me a Coffee.


Here’s a post you might find handy if you are looking for some free resources to help you get up and running with ❤️ SvelteKit.
— Rodney (@askRodney) June 7, 2022
We look at 10 key tips including tooling, adding favicons and even SEO.
Hope you find it useful!
#SvelteJS #SvelteKit https://t.co/yI6LOspQjX
Finally, feel free to share the post on your social media accounts for all your followers who will find it useful. You can get in touch via @askRodney on Twitter and also askRodney on Telegram . Also, see further ways to get in touch with Rodney Lab. I post regularly on Astro as well as SvelteKit. Also, subscribe to the newsletter to keep up-to-date with our latest projects.