


☁️ Serverless Astro #
Here we will see how you can set up an Astro landing page form. Astro builds static sites, which are typically faster and more secure. Using serverless functions, you can add functionality traditionally handled by a backend yet keep the Astro speed. When it comes to serverless there are a number of options, writing code in JavaScript, Rust or other languages and also in terms of the platform the code runs on. Netlify offers hassle-free setup, and we will stick with JavaScript in case this is your first time trying serverless.
As just hinted, serverless functions let you run traditional back-end operations without having to configure and maintain a back end server. Typically, they are cheap to run and can easily scale up to handle high demand. The main trade-off is spin-up time, the time between the request being received and the cloud server being ready to start working on the request. This is falling all the time and in fact is not critical for our use case.
🧱 What we’re Building #

We will use Astro and Svelte to create a single page site; a landing page for a book launch. The focus is on how to integrate serverless functions with Astro, so we will keep the site fairly basic. This makes this an ideal tutorial to follow if you are just getting started with Astro. We will add a contact form and see how you can link that up to Netlify serverless functions. The serverless function will use a Telegram bot to send a message to a Telegram private chat. This can make the app more convenient to use, as site admins can have access to messages via the Telegram mobile app as well as while they are at their desk.
Netlify makes the serverless function available via an endpoint on the same
domain the site is hosted on. We will invoke the Netlify function by sending a
REST POST request (containing form data in the body).
If this all sounds interesting, then let’s get going!
⚙️ Astro Setup #
We are going to use Svelte to create the contact form and interface with the serverless function, so need to add the Svelte integration as we set up Astro. Let’s do that now from the Terminal:
pnpm create astro@latest astro-contact-formpnpm installpnpm astro telemetry disable # skip this if you want Astro to collect datapnpm astro add sveltepnpm dev
Choose the Minimal app template and accept suggested config when
prompted. Once that’s all done, open up your browser just to check we’re
good to go. The CLI will tell you where the local dev server is running, this will
be http://localhost:3000 if there is not already
something running on port 3000. Don’t
expect too much (yet)! If all is working well, you will just see the word
“Astro” in the browser window.
Have a look at astro.config.mjs in the project root
folder. Astro has added the Svelte integration for you!
🏡 Astro Landing Page Home Page #
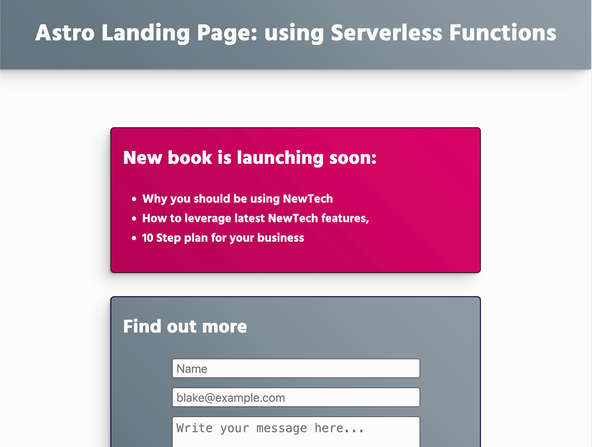
We will start with the home page. The markup will all be done in Astro, and we
will only use Svelte for the contact form. Replace the content in src/pages/index.astro:
1 ---2 ---3 4 <html lang="en-GB">5 <head>6 <meta charset="utf-8" />7 <meta name="viewport" content="width=device-width" />8 <title>Astro Contact Form: using Netlify Serverless Functions</title>9 </head>10 <body>11 <header class="header-container">12 <h1>Astro Landing Page: using Serverless Functions</h1>13 </header>14 <main class="main-container">15 <section class="card">16 <h2>New book is launching soon:</h2>17 <ul>18 <li>Why you should be using NewTech</li>19 <li>How to leverage latest NewTech features,</li>20 <li>10 Step plan for your business</li>21 </ul>22 </section>23 <section class="card card-alt">24 <h2>Find out more</h2>25 <p>Contact form will go here </p>26 </section>27 </main>28 </body>29 </html>
Add some optional styling to make it look a little nicer:
src/pages/index.astro — click to expand code.
31 <style>32 /* hind-regular - latin */33 @font-face {34 font-family: Hind;35 font-style: normal;36 font-weight: var(--font-weight-normal);37 src: local(''), url('/fonts/hind-v15-latin-regular.woff2') format('woff2'),38 url('/fonts/hind-v15-latin-regular.woff') format('woff');39 }40 41 /* hind-700 - latin */42 @font-face {43 font-family: Hind;44 font-style: normal;45 font-weight: var(--font-weight-bold);46 src: local(''), url('/fonts/hind-v15-latin-700.woff2') format('woff2'),47 url('/fonts/hind-v15-latin-700.woff') format('woff');48 }49 50 :global(html) {51 background-color: var(--colour-light);52 font-family: var(--font-body);53 accent-color: var(--colour-brand);54 }55 56 :global(body) {57 margin: 0;58 font-weight: var(--font-weight-normal);59 }60 61 :global(h1, h2) {62 font-family: var(--font-heading);63 }64 65 :global(h1) {66 font-size: var(--font-size-6);67 font-weight: var(--font-weight-bold);68 }69 70 :global(h2) {71 font-size: var(--font-size-5);72 font-weight: var(--font-weight-bold);73 }74 75 :global(form) {76 display: flex;77 flex-direction: column;78 width: min(32rem, 100%);79 margin-left: auto;80 margin-right: auto;81 color: var(--colour-dark);82 }83 84 :global(input, textarea) {85 width: 100%;86 text-indent: var(--spacing-2);87 padding: var(--spacing-1) var(--spacing-0);88 margin: var(--spacing-0) var(--spacing-0) var(--spacing-5);89 border: var(--spacing-px) solid var(--colour-theme);90 border-radius: var(--spacing-1);91 font-size: var(--font-size-3);92 background-color: var(--colour-light);93 }94 95 :global(textarea) {96 padding: var(--spacing-2) var(--spacing-0);97 resize: none;98 }99 100 :global(button) {101 background-color: var(--color-brand);102 background-image: var(--colour-brand-gradient);103 border: var(--spacing-px-2) solid var(--colour-light);104 border-radius: var(--spacing-2);105 padding: var(--spacing-2) var(--spacing-6);106 font-size: var(--font-size-3);107 font-weight: var(--font-weight-bold);108 color: var(--colour-light);109 cursor: pointer;110 }111 112 :global(.screen-reader-text) {113 border: 0;114 clip: rect(1px, 1px, 1px, 1px);115 clip-path: inset(50%);116 height: 1px;117 margin: -1px;118 width: 1px;119 overflow: hidden;120 position: absolute !important;121 word-wrap: normal !important;122 }123 124 :global(.error-text) {125 color: var(--colour-brand);126 }127 128 :global(:root) {129 --colour-theme: hsl(334 43% 17%); /* dark purple */130 --colour-brand: hsl(332 97% 43%); /* dogwood rose */131 --colour-alt: hsl(201 11% 41%); /* cadet */132 --colour-light: hsl(0 0% 99%); /* cultured */133 --colour-dark: hsl(245 100% 15%); /* midnight blue */134 135 --colour-brand-gradient: linear-gradient(136 45deg,137 hsl(332deg 97% 36%) 0%,138 hsl(332deg 97% 37%) 21%,139 hsl(332deg 97% 38%) 30%,140 hsl(332deg 97% 38%) 39%,141 hsl(332deg 97% 39%) 46%,142 hsl(332deg 97% 40%) 54%,143 hsl(332deg 97% 41%) 61%,144 hsl(332deg 97% 42%) 69%,145 hsl(332deg 97% 42%) 79%,146 hsl(332deg 97% 43%) 100%147 );148 --colour-alt-gradient: linear-gradient(149 45deg,150 hsl(204deg 11% 44%) 0%,151 hsl(204deg 11% 46%) 21%,152 hsl(204deg 10% 48%) 30%,153 hsl(204deg 10% 49%) 39%,154 hsl(204deg 10% 51%) 46%,155 hsl(204deg 10% 53%) 54%,156 hsl(204deg 10% 55%) 61%,157 hsl(204deg 10% 56%) 69%,158 hsl(204deg 10% 58%) 79%,159 hsl(205deg 11% 60%) 100%160 );161 162 --spacing-0: 0;163 --spacing-px: 1px;164 --spacing-px-2: 2px;165 --spacing-1: 0.25rem;166 --spacing-2: 0.5rem;167 --spacing-4: 1rem;168 --spacing-5: 1.25rem;169 --spacing-6: 1.5rem;170 --spacing-12: 3rem;171 --spacing-18: 4.5rem;172 --max-width-wrapper: 48rem;173 174 --font-size-root: 16px;175 --font-size-3: 1.563rem;176 --font-size-5: 2.441rem;177 --font-size-6: 3.052rem;178 179 --font-weight-normal: 400;180 --font-weight-bold: 700;181 182 --font-heading: 'Hind';183 --font-body: 'Hind';184 185 /* CREDIT: https://www.joshwcomeau.com/shadow-palette/ */186 --shadow-color: 0deg 0% 58%;187 --shadow-elevation-medium: -1px 1px 1.4px hsl(var(--shadow-color) / 0.51),188 -2.7px 2.7px 3.7px -1.2px hsl(var(--shadow-color) / 0.43),189 -7.6px 7.6px 10.5px -2.3px hsl(var(--shadow-color) / 0.36),190 -20px 20px 27.6px -3.5px hsl(var(--shadow-color) / 0.29);191 }192 193 :global(input:focus, textarea:focus) {194 border-color: var(--colour-brand);195 }196 197 .header-container {198 display: grid;199 background-color: var(--colour-alt);200 background-image: var(--colour-alt-gradient);201 box-shadow: var(--shadow-elevation-medium);202 color: var(--colour-light);203 height: var(--spacing-24);204 place-content: center;205 }206 207 .main-container {208 display: flex;209 flex-direction: column;210 color: var(--colour-light);211 width: min(100% - var(--spacing-12), var(--max-width-wrapper));212 margin: var(--spacing-18) auto;213 padding: var(--spacing-12);214 font-size: var(--font-size-3);215 }216 217 .main-content {218 display: flex;219 flex-direction: column;220 margin: var(--spacing-6);221 padding: var(--spacing-2) var(--spacing-12) var(--spacing-6);222 background-color: var(--colour-light);223 border-radius: var(--spacing-1);224 color: var(--colour-dark);225 }226 .card {227 border: var(--spacing-px-2) solid var(--colour-theme);228 box-shadow: var(--shadow-elevation-medium);229 background-color: var(--colour-theme);230 background-image: var(--colour-brand-gradient);231 padding: var(--spacing-0) var(--spacing-6) var(--spacing-6);232 margin: var(--spacing-0) var(--spacing-0) var(--spacing-12);233 border-radius: var(--spacing-2);234 }235 236 .card-alt {237 border-color: var(--colour-dark);238 background-color: var(--colour-alt);239 background-image: var(--colour-alt-gradient);240 color: var(--colour-light);241 }242 </style>
We are using self-hosted fonts here. You can download the fonts from google-webfonts-helper . Unzip and move the four files to a new public/fonts folder.
Astro Aliases #
If that’s all working, we will move on to the contact form component.
Astro lets you define aliases for folders within your project. This can be
more convenient than writing something like import ContactForm from '../../components/ContactForm.svelte'.
First create a src/components folder then edit tsconfig.json in the project root folder, so it looks like this:
1 {2 "compilerOptions": {3 "baseUrl": ".",4 "paths": {5 "~*": ["src/*"]6 }7 },8 "extends": "astro/tsconfigs/strict"9 }
Now add the component to the Home Page (it won’t work until we actually create and define the Svelte component).
1 ---2 import ContactForm from '~components/ContactForm.svelte';3 ---
24 <section class="card card-alt">25 <h2>Find out more</h2>26 <ContactForm client:load />27 </section>---
The client:load directive in line 26 is an Astro
hydration parameter. We use load here to tell Astro
always to hydrate the ContactForm component, making
it interactive by letting its JavaScript load. This makes sense here as the form
will probably be in view when the page loads, not to mention that it is a main feature
of the page. If we had a contact form which was JavaScript heavy and far down the
page (so initially out of view) we could instruct Astro to hydrate it only when
visible, using client:visible. This would
improve user experience, optimizing loading the visible content faster.
Contact Form #
Typically, you will add client-side and serverless-side form input validation. To keep the code lean and stop the post getting too long, we will not add this here, though. Let me know if you would like to see some possible ways to do this; I could write a separate post.
Create src/components/ContactForm.svelte and add
the content below. You see, we can add additional scoped styling within Astro Svelte
components. Remove this style block if you are skipping
styling.
1 <script>2 let botField = $state('');3 let name = $state('');4 let email = $state('');5 let message = $state('');6 7 let serverState = $state('');8 let submitting = $state(false);9 10 function handleServerResponse(ok, msg) {11 serverState = { ok, msg };12 }13 14 const handleSubmit = async (event) => {15 event.preventDefault();16 console.log({ email, name, message });17 try {18 submitting = true;19 await fetch(`/.netlify/functions/contact-form-message`, {20 method: 'POST',21 credentials: 'omit',22 headers: {23 'Content-Type': 'application/json',24 },25 body: JSON.stringify({26 botField,27 email,28 name,29 message,30 }),31 });32 submitting = false;33 handleServerResponse(true, '');34 } catch (error) {35 console.error(`Eror: ${error}`);36 submitting = false;37 handleServerResponse(38 false,39 'Unable to send your message at the moment. Please try again later.',40 );41 }42 };43 </script>44 45 <form onsubmit={handleSubmit} class="form-container">46 <input aria-hidden="true" type="hidden" name="bot-field" bind:value={botField} />47 <div>48 <span class="screen-reader-text"><label for="name">Name</label></span>49 <input bind:value={name} required id="name" placeholder="Name" title="Name" type="text" />50 </div>51 <div>52 <span class="screen-reader-text"><label for="email">Email</label></span>53 <input54 bind:value={email}55 required56 id="email"57 placeholder="[email protected]"58 title="Email"59 type="email"60 />61 </div>62 <div>63 <span class="screen-reader-text"><label for="message">Message</label></span>64 <textarea65 bind:value={message}66 required67 id="message"68 rows={6}69 placeholder="Write your message here..."70 title="Message"71 type="text"72 ></textarea>73 </div>74 <div class="button-container">75 <button type="submit" disabled={submitting}> Send</button>76 </div>77 {#if serverState}<p class={!serverState.ok ? 'errorMsg' : ''}>78 {serverState.msg}79 </p>{/if}80 </form>81 82 <style>83 .button-container {84 display: flex;85 width: 100%;86 margin: var(--spacing-2);87 justify-content: flex-end;88 }89 </style>
We add very basic bot detection in the form of a honeypot field (line 46). This is not displayed in, or announced by, the browser, but a bot would
find it and might be tempted to fill it out. So any time we see a response
with this field filled out, we can assume a bot filled it out. For a
production app, you might consider using a spam detection service like Akismet or Cloudflare bot detection HTTP headers. Captchas might also be suitable in some cases.
The form fields use Svelte input bindings, this is a little different to (and simpler than) what you might be used to if you come from a React background. Let me know if a separate post or video on Svelte form and input bindings would be useful.
Although we later add the Axios package for use in the serverless function,
the fetch API helps us out here with actually reaching the serverless
function. We send a JSON POST request to /.netlify/functions/contact-form-message. For this to work, we need to create the serverless function with a file
name contact-form-message.js. We will do
that next!
🌥 Serverless Function #
First, we will add some Netlify configuration to the project. Create netlify.toml in the project’s root folder and add this content:
1 [build]2 command = "npm run build"3 functions = "netlify/functions"4 publish = "dist"
Notice the publish directory is dist which is where
Astro outputs your build site to. Next, we can create the functions folder: netlify/functions then add contact-form-message.js. If you
prefer TypeScript, change the extension and also add the @netlify/functions package. You can import types (only if you are working in TypeScript) adding
import type { Handler } from '@netlify/functions'; to the top of this file.
import axios from 'axios';const { TELEGRAM_BOT_API_TOKEN, TELEGRAM_BOT_CHAT_ID } = process.env;async function notifyViaTelegramBot({ honeyBotFlaggedSpam, name, email, message }) { try { const data = JSON.stringify( { honeyBotFlaggedSpam, name, email, message, }, null, 2, ); const text = `Contact form message: ${data}`; await axios({ url: `https://api.telegram.org/bot${TELEGRAM_BOT_API_TOKEN}/sendMessage`, method: 'POST', data: { chat_id: TELEGRAM_BOT_CHAT_ID, text, }, }); return { successful: true }; } catch (error) { let message; if (error.response) { message = `Telegram server responded with non 2xx code: ${error.response.data}`; } else if (error.request) { message = `No Telegram response received: ${error.request}`; } else { message = `Error setting up telegram response: ${error.message}`; } return { successful: false, error: message }; }}export async function handler({ body, httpMethod }) { try { if (httpMethod !== 'POST') { return { statusCode: 405, body: 'Method Not Allowed', }; } const data = JSON.parse(body); const { botField, email, name, message } = data; const { error: telegramError } = await notifyViaTelegramBot({ honeyBotFlaggedSpam: botField !== '', email, name, message, }); if (telegramError) { return { statusCode: 400, body: telegramError, }; } return { statusCode: 200, body: 'Over and out.' }; } catch (error) { return { statusCode: 400, body: `Handler error: ${error}`, }; }}export default handler;
As mentioned earlier, we use Axios here to contact Telegram servers, relaying the contact message to our private chat. We can add it as a project dependency now:
pnpm add axios
Let’s set up a Telegram bot, so we can get the environment variables needed to wire this up.
🤖 Telegram Bot #
Please enable JavaScript to watch the video 📼
The process for getting Telegram API credentials is quite simple, just follow step by step, and you will have API keys in a couple of minutes.
- Bots are created by Telegram's Bot Father — isn't that cute! Open up a new chat with @BotFather .
-
You interact with bots in Telegram by typing commands which begin with a
/in the chat window. Create a new bot using the command/newbot. Bot Father will ask you for a name and then a username. The name can be anything, but the username needs to endbotand should only contain alphanumeric characters and underscores. I will use “Astro Landing Page Form Site” as the name andastro_landing_page_form_botas the username. Bot Father will respond with the new API key for your bot make a note of this. - Next, we need to create a new group chat and add the bot to it (you can also add anyone whom you want to receive bot messages). From the Telegram menu, select New Group. Enter a name for the group when prompted, then in the Add Members window type the username of your bot.
-
We’re almost done. Next, we need to get the ID for this new group
chat, so we can send messages to it from the Netlify Serverless Function.
From the group chat, send a message to the bot by typing the following
command as a message “
/my_id @my_bot” replacemy_botwith the name of your bot. -
In the Terminal, use curl to see the bot’s updates. Remember to
replace
123456789:AaBbCcDdEeFfGgHhIiJjKkLlMmNnOoPpQqwith the API key you got earlier: - how to set up an Astro Svelte project;
- how to use Netlify serverless functions to provide “back-end” functionality to your Astro app; and
- a convenient and efficient way to manage environment variables in your Netlify project.
Can you add back-end functions to an Astro static site? #
- Services like Netlify make it easy to add serverless functions to your static site. This is with the added convenience of not having to set up and maintain infrastructure. Other advantages include not having to worry about ensuring there is enough capacity online to handle incoming requests. One disadvantage is the spin-up time for serverless functions; typically there is a short delay between the request being received and work starting on processing it. Spin-up times are dropping and for many use cases they are not an issue. If you need minimal spin-up time, consider a Cloudflare Worker as the setup there offers considerable help.
Does Astro work with serverless functions? #
- Astro works well with serverless functions. Essentially, you can decouple your static site and the serverless functions. This makes it easier to keep the serverless functions if you later decide to move from Astro to another site builder. You can use serverless to add features like contact forms and comments, as well as registering likes to a database. On an e-commerce site, you might use serverless functions to get the latest stock levels displayed to the user interface.
Do you have to write JAMStack serverless functions in JavaScript #
- We have seen how to write a JavaScript serverless function using Netlify. On Netlify, you can also write Rust and Go serverless functions. Other services like Cloudflare workers also support Rust.
Retreive Chat ID #
curl -L https://api.telegram.org/bot123456789:AaBbCcDdEeFfGgHhIiJjKkLlMmNnOoPpQq/getUpdates
If you don’t have curl on your machine, just paste the link into your browser instead. If you are working on a shared machine, be sure to clear the link from the browser history, as it contains an API key.
You will get a response back something like this:
1 {2 "ok": true,3 "result": [4 {5 "update_id": 741497477,6 "message": {7 "message_id": 2,8 "from": {9 "id": 1234567890,10 "is_bot": false,11 "first_name": "Rodney",12 "last_name": "Lab",13 "username": "askRodney"14 },15 "chat": {16 "id": -123456789,17 "title": "Astro Landing Page Form Site",18 "type": "group",19 "all_members_are_administrators": true20 },21 "date": 1623667295,22 "text": "/my_id @astro_landing_page_form_bot",23 "entities": [24 { "offset": 0, "length": 6, "type": "bot_command" },25 { "offset": 7, "length": 29, "type": "mention" }26 ]27 }28 }29 ]30 }
OK this is just some JSON. It contains two ids, although we just need one.
The first is the message ID. We don’t need this one. The second,
within the chat object, starts with a “-”, this is the required chat ID, including the “-”.
We have all the API data we need to proceed. Let's carry on by setting up or function.
Netlify Environment Variables #
Netlify has the easiest way for handling environment. You can add them
manually using the web console, though I prefer the CLI. If you want to
try my way, add the Telegram credentials to a new .env file:
TELEGRAM_BOT_API_TOKEN="123456789:AaBbCcDdEeFfGgHhIiJjKkLlMmNnOoPpQq"TELEGRAM_BOT_CHAT_ID="-123456789"
Notice, you should not prefix these with PUBLIC_ as you would normally do for Astro environment variables. This is because
we do not need to expose the credentials on the front end, just for the serverless
function. In fact, another advantage of using serverless functions is the added
security of not needing to expose credentials to the client. Next you will need
to install the Netlify CLI globally on your machine, if you do not already have
it installed:
pnpm add -g netlify-cli
Next, commit your project to GitHub, GitLab or whichever service you use
and set it up as you normally do. Be sure to add .env to the .gitignore file, so the credentials
do not end up in your remote repo. If this is your first time using Netlify,
follow the step-by-step deploy instructions . Once the project is set up, just run the following commands from the
project folder:
netlify initnetlify env:import .env
Just follow prompts to the right project, and this will take the variables
from the .env file and add them to your project
on Netlify's servers. There is not a massive convenience pickup as we only have
two variable here, but for larger projects it is definitely worth the effort.
Learn more about managing Netlify environment variables from Netlify .
You might need to rebuild the site once you have added the environment variables.
🗳 Poll #
💯 Astro Landing Page Contact Form: Testing #
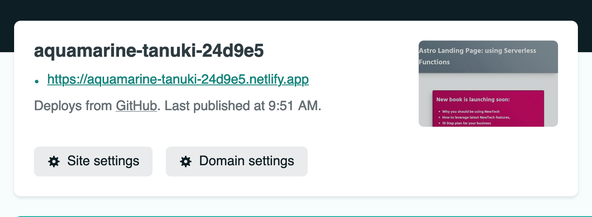
Everything should be working now, so let’s test it. The Netlify console will give you a link to the freshly built site. Follow the link and complete the contact form. Open up your Telegram app, and you should have a message in the group chat you created.

🙌🏽 Astro Landing Page Contact Form: Wrapping Up #
In this post we have had an introduction to Astro and seen:
The full code for the app is available in the Astro demo repo on Rodney Lab GitHub .
I hope you found this article useful and am keen to hear how you plan to use the Astro code in your own projects.
🏁 Astro Landing Page Form: Summary #
🙏🏽 Astro Landing Page Contact Form: Feedback #
Have you found the post useful? Would you prefer to see posts on another topic instead? Get in touch with ideas for new posts. Also, if you like my writing style, get in touch if I can write some posts for your company site on a consultancy basis. Read on to find ways to get in touch, further below. If you want to support posts similar to this one and can spare a few dollars, euros or pounds, please consider supporting me through Buy me a Coffee.


Just dropped a new post on how you can use Serverless with Astro.
— Rodney (@askRodney) March 30, 2022
You see how to set up a landing page with contact form using Astro with Netlify Serverless functions and a spot of Svelte.
I hope you find it useful!
https://t.co/hyOW0mq1cI#AstroJS #svelte #serverless
Finally, feel free to share the post on your social media accounts for all your followers who will find it useful. As well as leaving a comment below, you can get in touch via @askRodney on Twitter and also askRodney on Telegram . Also, see further ways to get in touch with Rodney Lab. I post regularly on Astro as well as SvelteKit. Also, subscribe to the newsletter to keep up-to-date with our latest projects.