


📝 hCaptcha Forms in SvelteKit #
In this post, we look at a SvelteKit hCaptcha contact form for your Svelte site. hCaptcha is an alternative to Google reCAPTCHA. Both can be used to reduce spam submissions on your site's forms. hCaptcha claims to protect user privacy . By asking users to complete the hCaptcha challenge before submitting your form, you can filter some responses and further scrutinize them, based on the hCaptcha verdict.
There are two parts to the hCaptcha verification. The first is on the client side (frontend), where we ask the user to complete the challenge. We send the user challenge responses to hCaptcha straight away (from the client). hCaptcha then responds with a response code. That response code is needed in the second part of the process, which is completed in the backend. We will see how you can use Cloudflare workers to perform the backend part if you want to build a static SvelteKit site. If, however, you prefer server side rendered, we cover you back with some sample code for handling that in SvelteKit too.
If that all sounds exciting, why don’t we crack on?
🧱 hCaptcha Forms in SvelteKit #

The plan of action is the following:
- Clone the SvelteKit blog MDsveX starter , so we can hit the ground running.
- Add a contact form.
- Add the hCaptcha client code.
- Look at how Cloudflare workers can be used for the server side verification.
- Try an alternative server side rendered implementation.
- how to use hCaptcha with SvelteKit,
- a way to integrate Rust Cloudflare workers into a static site, making it easier to share code across different frameworks,
-
tweaking the Content Security Policy via the
hooks.jsfile to allow connection to external hosts.
🗳 Poll #
⚙️ Getting Started #
Let's get started by cloning the SvelteKit blog MDsveX starter :
git clone https://github.com/rodneylab/sveltekit-blog-mdx.git sveltekit-hcaptcha-formcd sveltekit-hcaptcha-formpnpm installcp .env.EXAMPLE .envpnpm dev
We will also use some components from a SvelteKit component library to speed up development. Let's install those now too:
pnpm install -D @rodneylab/sveltekit-components
Finally, you will need hCaptcha credentials to test out your code. Head to
the hCaptcha site for this. Once you have credentials, add them to your .env file:
19 VITE_HCAPTCHA_SITEKEY="10000000-ffff-ffff-ffff-000000000001"20 VITE_WORKER_URL="http://127.0.0.1:8787"21 22 HCAPTCHA_SECRETKEY="0x0000000000000000000000000000000000000000"
The first two credentials will be accessed by the client side, so they will
require a PUBLIC_ prefix. Finally, we allow access
to client components in src/lib/config/website.js:
src/lib/config/website.js — click to expand code.
22 import {23 PUBLIC_CONTACT_EMAIL,24 PUBLIC_FACEBOOK_PAGE,25 PUBLIC_GITHUB_PAGE,26 PUBLIC_LINKEDIN_PROFILE,27 PUBLIC_SITE_URL,28 PUBLIC_TELEGRAM_USERNAME,29 PUBLIC_TIKTOK_USERNAME,30 PUBLIC_TWITTER_USERNAME,31 PUBLIC_TWITTER_USER_ID,32 PUBLIC_WIRE_USERNAME,33 PUBLIC_HCAPTCHA_SITEKEY,34 PUBLIC_WORKER_URL,35 } from '$env/static/public';36 37 const facebookPageName = PUBLIC_FACEBOOK_PAGE;38 39 const website = {40 author: 'Rodney Johnson',41 ogLanguage: 'en_GB',42 siteLanguage: 'en-GB',43 siteTitle: 'SvelteKit Blog Mdx',44 siteShortTitle: 'SvelteKit Blog',45 siteUrl: PUBLIC_SITE_URL,46 icon: 'static/icon.png',47 backgroundColor: '#1b4079',48 themeColor: '#d62828',49 contactEmail: PUBLIC_CONTACT_EMAIL,50 facebookPage: PUBLIC_FACEBOOK_PAGE,51 facebookPageName,52 githubPage: PUBLIC_GITHUB_PAGE,53 linkedinProfile: PUBLIC_LINKEDIN_PROFILE,54 telegramUsername: PUBLIC_TELEGRAM_USERNAME,55 tiktokUsername: PUBLIC_TIKTOK_USERNAME,56 twitterUsername: PUBLIC_TWITTER_USERNAME,57 twitterUserId: PUBLIC_TWITTER_USER_ID,58 wireUsername: PUBLIC_WIRE_USERNAME,59 hcaptchaSitekey: PUBLIC_HCAPTCHA_SITEKEY,60 workerUrl: PUBLIC_WORKER_URL,61 };62 63 export { website as default };
With the setup out of the way, if this is your first time using the starter,
have a skim through the files and folders of the project. Also head to localhost:5173/ and do some clicking around, to familiarize yourself with the site. When you're
ready to carry on.
⚓️ Hooks Configuration #
We just need to tweak the hooks configuration for everything to run
smoothly. The src/hooks.server.js file in the
project includes Content Security Policy (CSP) headers. These are an added security
measure which only allow the browser to connect to certain hosts. For any site
you build with the starter, you will probably need to tweak this file. We need
to allow connections to hCaptcha and our Cloudflare worker for this project:
6 import {7 PUBLIC_DOMAIN,8 PUBLIC_SENTRY_KEY,9 PUBLIC_SENTRY_PROJECT_ID,10 PUBLIC_WORKER_URL,11 } from '$env/static/public';12 13 const rootDomain = PUBLIC_DOMAIN; // or your server IP for dev14 15 const directives = {16 'base-uri': ["'self'"],17 'child-src': ["'self'"],18 // 'connect-src': ["'self'", 'ws://localhost:*'],19 'connect-src': [20 "'self'",21 'ws://localhost:*',22 'https://hcaptcha.com',23 'https://*.hcaptcha.com',24 PUBLIC_WORKER_URL,25 ],
You will need to make these changes during development, whether you are creating a static or server side rendered site. For a static production site, the file is not used. You can add HTTP headers to achieve the same effect. Check how to do this with your hosting platform.
🧑🏽 Contact Form #
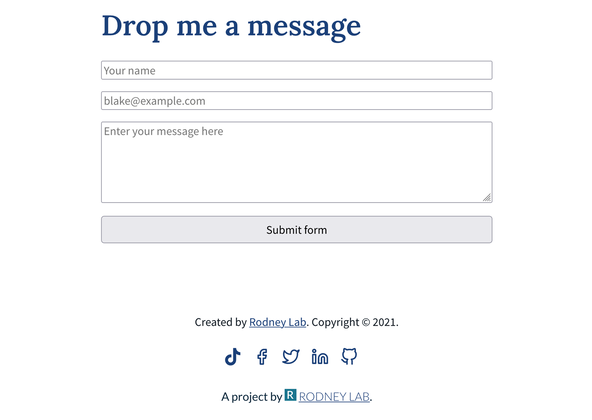
Here's the code for the basic contact form. We are using the component
library to save us typing out all the boilerplate needed for accessible form
inputs. You can see how to create your own SvelteKit component library in a recent video post. Paste the code into a new file at src/lib/components/ContactForm.svelte:
1 <script>2 import { EmailInputField, TextArea, TextInputField } from '@rodneylab/sveltekit-components';3 import website from '$lib/config/website';4 import { onMount, onDestroy } from 'svelte';5 import { browser } from '$app/environment';6 7 const { hcaptchaSitekey, workerUrl } = website;8 9 onMount(() => {10 11 });12 13 onDestroy(() => {14 15 });16 17 let name = '';18 let email = '';19 let message = '';20 let errors: {21 name?: string;22 email?: string;23 message?: string;24 };25 $: errors = {};26 $: submitting = false;27 28 function clearFormFields() {29 name = '';30 email = '';31 message = '';32 }33 34 <form class="form" on:submit|preventDefault={handleSubmit}>35 <h2>Drop me a message</h2>36 <TextInputField37 id="form-name"38 value={name}39 placeholder="Your name"40 title="Name"41 error={errors?.name ?? null}42 on:update={(event) => {43 name = event.detail;44 }}45 style="padding-bottom:1rem"46 />47 <EmailInputField48 id="form-email"49 value={email}50 placeholder="[email protected]"51 title="Email"52 error={errors?.email ?? null}53 on:update={(event) => {54 email = event.detail;55 }}56 style="width:100%;padding-bottom:1rem"57 />58 <TextArea59 id="form-message"60 value={message}61 placeholder="Enter your message here"62 title="Message"63 error={errors?.message ?? null}64 on:update={(event) => {65 message = event.detail;66 }}67 style="padding-bottom:1rem"68 />69 <button type="submit" disabled={submitting}>Submit form</button>70 </form>71 72 <style lang="scss">73 .form {74 display: flex;75 flex-direction: column;76 width: 80%;77 margin: $spacing-6 auto;78 }79 button {80 cursor: pointer;81 padding: $spacing-2 $spacing-0;82 }83 </style>
The EmailInputField, TextArea and TextInputField components come from the
component library. They make use of Svelte's component events to keep the value displayed in sync with the email, message and name variables in this component. Follow the previous link to the Svelte tutorial
if you are not yet familiar with this API.
To stop this post getting too long, we won't go into detail on the rest of the form code here. That said, do let me know if you would appreciate a separate post on Svelte forms and binding form fields to variables.
🤖 Adding hCaptcha #
We will add the client hCaptcha script directly to the DOM. You have
probably seen this pattern if you have looked at tracking or analytics code
previously. In SvelteKit, you will see you don't need to add any extra
packages to make this work. Before we do that, let's actually load the
script in the component onMount function:
9 let hcaptcha = { execute: async (_a, _b) => ({ response: '' }), render: (_a, _b) => {} };10 let hcaptchaWidgetID;11 12 onMount(() => {13 if (browser) {14 hcaptcha = window.hcaptcha;15 if (hcaptcha.render) {16 hcaptchaWidgetID = hcaptcha.render('hcaptcha', {17 sitekey: hcaptchaSitekey,18 size: 'invisible',19 theme: 'dark',20 });21 }22 }23 });24 25 onDestroy(() => {26 if (browser) {27 hcaptcha = { execute: async () => ({ response: '' }), render: () => {} };28 }29 });
We are adding an “invisible” hCaptcha, so we will use the hcaptchaWidgetID variable to identify it. The first lines are just there to keep types consistent
and to be able to link and unlink the hCaptcha script to a local variable during
component creation and destruction. We add our hCaptcha site key in the hCaptcha
initialization, within onMount.
Next, we need a handleSubmit function:
43 async function handleSubmit() {44 try {45 const { response: hCaptchaResponse } = await hcaptcha.execute(hcaptchaWidgetID, {46 async: true,47 });48 /* for a static site, you can use a Cloudflare worker to manage the server part of the49 * hCaptcha and send your site admin an email with the contact details50 *51 * in this case, use:52 *53 * fetch(`${workerUrl}/verify`, {54 *55 * for a server side rendered app, use the verify endpoint to do the processing:56 *57 * fetch('/api/verify', {58 */59 fetch(`${workerUrl}/verify`, {60 method: 'POST',61 credentials: 'omit',62 headers: {63 'Content-Type': 'application/json',64 },65 body: JSON.stringify({66 name,67 email,68 message,69 response: hCaptchaResponse,70 }),71 });72 console.log('Details: ', { name, email, message });73 clearFormFields();74 } catch (error) {75 console.error('Error in contact form submission');76 }77 }78 </script>
The function starts with a hcaptcha.execute function
call. This displays the captcha and waits for the user to complete it. It then
contacts hCaptcha to get a response which we will
need for the second part. Interestingly, execute gathers information on mouse movement, while solving the challenge as well
as the user answers.
The rest of the function includes two possibilities. If we have a static site, we can send our form data and the hCaptcha response to a Cloudflare worker for processing. If you are a SvelteKit purist and go for a server side rendered site, you can send the request to a SvelteKit endpoint. Let's look at both ways in more detail in a moment.
As we mentioned earlier, we can add the hCaptcha script to the DOM:
80 <svelte:head>81 <script src="https://js.hcaptcha.com/1/api.js?render=explicit" async defer></script>82 </svelte:head>
Then we need a placeholder div for it to render:
119 <button type="submit" disabled={submitting}>Submit form</button>120 <div121 id="hcaptcha"122 class="h-captcha"123 data-sitekey={hcaptchaSitekey}124 data-size="invisible"125 data-theme="dark"126 />127 </form>
🔗 SvelteKit hCaptcha Contact Form: Linking it all Up #
Importantly, we should import the ContactForm component on the contact page, so we can render it:
19 import ContactForm from '$lib/components/ContactForm.svelte';
82 </div></Card83 >84 <ContactForm />85 86 <style lang="scss"
🤖 Adding hCaptcha: Rust Cloudflare Worker Style #
Cloudflare workers run in a Web Assembly (WASM) environment, which means you
can write your code in Rust or even C++ instead of JavaScript if you choose.
I like this as a solution because if you are building client sites in
SvelteKit as well as other frameworks, you only need to maintain one
codebase for parts of your backend. You can use the same code for contact
form submission from your SvelteKit and Next apps. Rust also offers
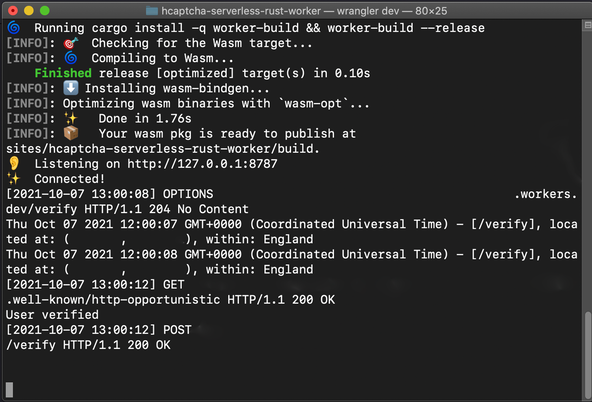
opportunities for code optimization. You can see how to set up a Rust Cloudflare service worker to handle hCaptcha in a
recent post. For local testing, you will probably have your worker running on http://127.0.0.1:8787, which is the value we defined in the .env file. You will just need to set it up to listen for POST requests on the /verify route.

🔥 Adding hCaptcha: SvelteKit Server Side Route Style #
Finally, let's check the SvelteKit way to handle the hCaptcha server side
work. Create a new file at src/routes/verify/+server.js and paste in the following code:
1 import { HCAPTCHA_SECRETKEY } from '$env/static/private';2 import { PUBLIC_HCAPTCHA_SITEKEY } from '$env/static/public';3 4 /** @type {import('./$types').RequestHandler} */5 export async function POST({ request }) {6 try {7 const { name, email, message, response: hCaptchaClientResponse } = await request.json();8 9 const secret = HCAPTCHA_SECRETKEY;10 const sitekey = PUBLIC_HCAPTCHA_SITEKEY;11 const body = new URLSearchParams({ response: hCaptchaClientResponse, secret, sitekey });12 13 const response = await fetch('https://hcaptcha.com/siteverify', {14 method: 'POST',15 credentials: 'omit',16 headers: {17 'Content-Type': 'application/x-www-form-urlencoded',18 },19 body: body.toString(),20 });21 22 const data = await response.json();23 const { success } = data;24 console.log('data: ', data);25 if (success) {26 console.log('hCaptcha says yes!');27 } else {28 console.log('hCaptcha says no!');29 }30 31 // process name, email and message here e.g. email site admin with message details32 console.log({ name, email, message });33 34 return new Response('OK');35 } catch (err) {36 const error = `Error in /verify.json.js: ${err}`;37 console.error(error);38 return {39 status: 500,40 error,41 };42 }43 }
The hCaptcha request needs to be submitted as form data and the response is
JSON. A successful field on the response indicates
whether hCaptcha considers the user a bot or not. For more details pull up the hCaptcha docs .
⛔️ SvelteKit hCaptcha Contact For: CORS errors #
If you get CORS errors testing the site, you should try tweaking your DNS
settings. This involves creating a hostname proxy for 127.0.0.1 (localhost).
On macOS, you can add the following line to the /private/etc/hosts file:
1 127.0.0.1 test.localhost.com
Then, instead of accessing the site via http://localhost:3030, in your browser use http://test.localhost.com:3030. This worked for me on macOS. The same will work on typical Linux and
Unix systems, though the file you change will be /etc/hosts. If you are using DNSCryprt Proxy or Unbound, you can make a similar
change in the relevant config files. If you use Windows and know how to do
this, please drop a comment below to help out other Windows users.
🙌🏽 SvelteKit hCaptcha Contact Form: What we Learned #
Please enable JavaScript to watch the video 📼
We have just covered the basics here. In a real-world app, you should add verification, at least on the server side. Feedback on the client side is a good idea too to improve user experience.
In this post we learned:
I do hope there is at least one thing in this article which you can use in your work or a side project. As always, get in touch with feedback if I have missed a trick somewhere!
You can see the full code for this SvelteKit hCaptcha Contact Form project on the Rodney Lab Git Hub repo .
🙏🏽 SvelteKit hCaptcha Contact Form: Feedback #
Have you found the post useful? Do you have your own methods for solving this problem? Let me know your solution. Would you like to see posts on another topic instead? Get in touch with ideas for new posts. Also, if you like my writing style, get in touch if I can write some posts for your company site on a consultancy basis. Read on to find ways to get in touch, further below. If you want to support posts similar to this one and can spare a few dollars, euros or pounds, please consider supporting me through Buy me a Coffee.
Finally, feel free to share the post on your social media accounts for all your followers who will find it useful. As well as leaving a comment below, you can get in touch via @askRodney on Twitter and also askRodney on Telegram . Also, see further ways to get in touch with Rodney Lab. I post regularly on SvelteKit as well as other topics. Also, subscribe to the newsletter to keep up-to-date with our latest projects.