


📱 Why make VoIP Calls on your Android Phone? #
In this post, we look at how to make Android VoIP calls using Telnyx. We will start by breaking that down, looking at what VoIP calls are. Then we see why making and receiving VoIP calls rather than using your network carrier can increase your privacy. Although we focus on Android 11 running on GrapheneOS, the techniques here have wider applications.
Voice over IP or VoIP is a way of making and receiving phone calls over the internet (IP stands for Internet Protocol). You can use VoIP on computers as well as mobile phones. In fact, many companies use VoIP networks and services on their internal networks.
We look at Telnyx as a private VoIP provider in this article, though other services like Twilio provide similar services which are equally effective.
👀 Mobile Phone Tracking #
There are a number of ways nefarious parties can track you, via unique identifiers sent from your mobile phone. Using a VoIP connection to place calls can limit tracking. For a more complete explanation, there is the excellent phone tracking episode from the Privacy, Security & OSInt podcast . Here is a brief summary.
IMEI #
The IMEI (International Mobile Equipment Identity) code (on GSM, or MEID on CDMA networks) is a unique number which identifies your mobile phone as a device. If you report your phone stolen, carriers might blacklist your device, using the IMEI number, which stops it connecting to networks (even if the thief changes the SIM card).
IMSI #
IMSI (International Mobile Subscriber Identity) is a unique identifier for your SIM card. Although typically your phone does not transmit it in full, it generates an identifier from it to let the carrier identify your account and allow use of the network. IMSI's can be used to track mobile phones in real time by intercepting communications. A third party can use stingray devices to obtain your IMSI and then intercept further communications and track you.
ICCID #
Integrated Circuit Card ID or SIM serial number is also sent to your carrier when your device is connected to the network.
MSISDN #
Mobile Stations International Subscriber Service Directory Number, or MSISDN is essentially your phone number. Your phone number can be used to track you! Even though you just give it to trusted friends and family there is a risk apps on their devices access and store it. It could be stored in databases by legitimate apps, which are later breached or leaked via unethical apps on their devices.
Your carrier has access to all four of these identifiers, and typically they would need good legal reason to reveal them to a third party. It is not impossible though that a rogue employee or unethical hacker gains access to the identifiers and is able to stalk you.
You can set up your phone to run a privacy focussed operating system, like GrapheneOS to limit the amount of tracking information that is sent to the phone manufacturer. VoIP takes it a step further, limiting the information your carrier has about you and also the amount of information which might be intercepted by a nefarious party like a stalker or someone wanting to harass you.
⛔️ Why make VoIP Calls on your Android Phone? #
A private way to use a mobile phone is never to make calls directly from the SIM. With GrapheneOS and some other Android-based operating systems, you have the ability to make VoIP calls using the phone's built-in dialler. Essentially you dial the number as normal and when you press call you get an option to use the SIM card or a VoIP number.
By always using the VoIP number, you limit the potential for tracking. If your SIM phone number gets leaked, there is a chance for you to be tracked via the identifiers mentioned above, linked to the device. By contrast, if a VoIP number is leaked, the number is not linked to your device identifiers the way your SIM number is. For added privacy, you should make VoIP calls only when connected to the internet with a secure Virtual Private Network (VPN).
As a summary, to maximize privacy, avoid using the SIM to make phone calls (or send SMS messages) and never give out the SIM phone number. Next, we see how you can set up your Telnyx account and then make VoIP calls on your Android device.
🔨 Setting up Telnyx #
To get going with Telnyx you will need to create an account , add some funds to the account and then choose your first VoIP number. When picking a number, you get some options like ability to fax (if you ever need to send a fax 😅) and ability to make emergency calls. You will also be able to pick the country and region for your number.
Once that is set up, it's time to fix the VoIP side. From the options on the left (on the Telnyx dashboard), select SIP Connections. SIP stands for Session Initiation Protocol and is the method we will use to make VoIP calls from our Android device. Towards the bottom of the screen, on the right, you will see a Connection name box. You can enter your new VoIP phone number here. For example, if your VoIP number is +44 5566 777 888, you can enter 445566777888. Next, below, beside Type you will see it says Credentials. Click the Credentials text and a new panel appears.

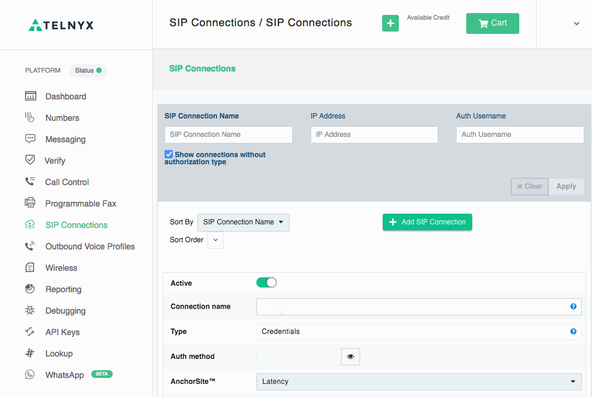
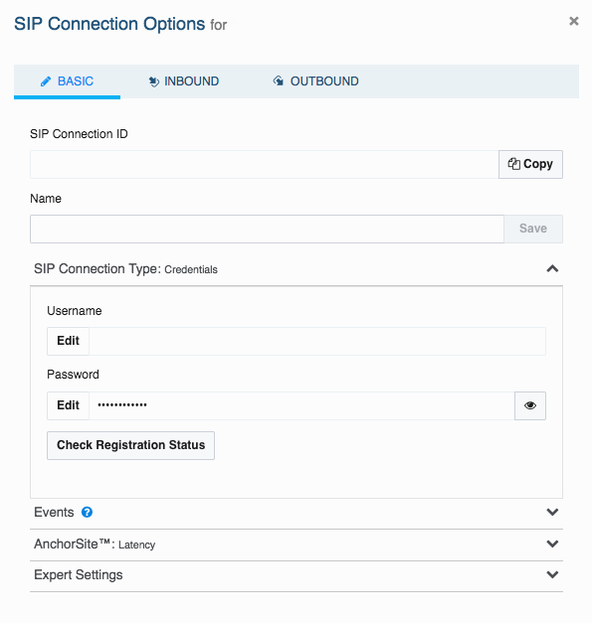
On this new panel, you can edit the username and password shown on this screen. These are the credentials you will need to enter on your phone.

As a final step, if you are based outside of North America, you will probably want to choose Outbound Voice Profiles from the menu on the left. From here, you can enable outbound calls to your home country and any other countries you want to call. By default, calls are only allowed to US and Canada numbers. Next we will set up the phone.
⚙️ Setting up VoIP on Android #
How to make Android VoIP Calls #
-
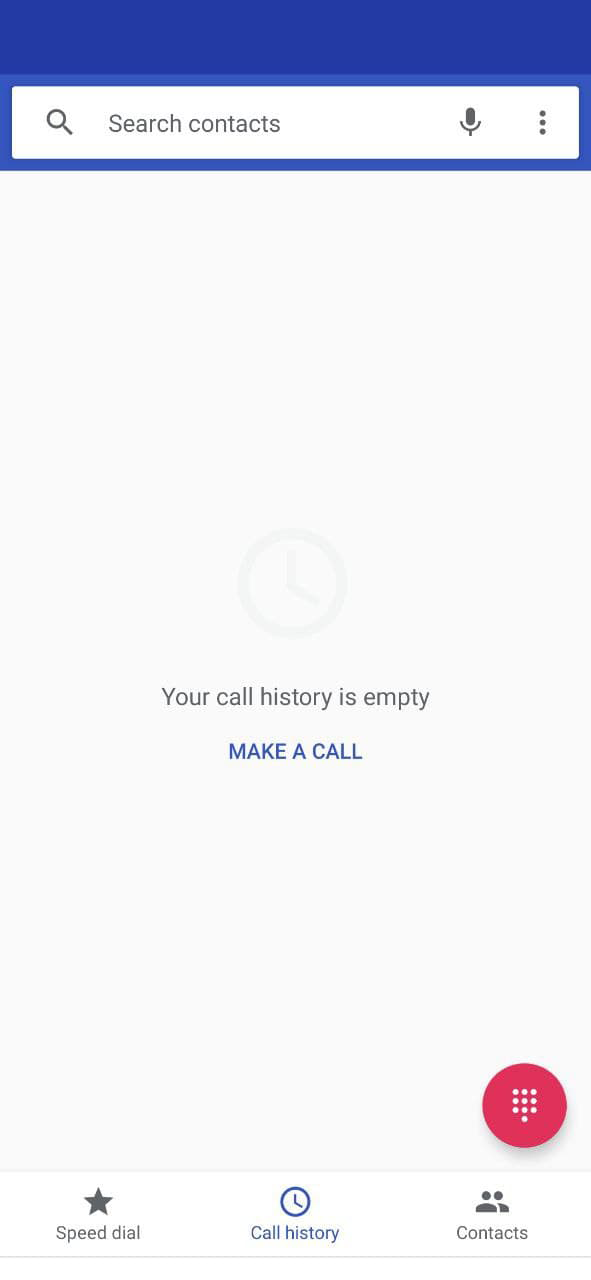
Open up the Phone app on your Android phone and tap the three dots icon
beside the microphone icon to open Settings.
How to make Android VoIP Calls with Telnyx: Screen Capture: Android Phone: Step 1 -
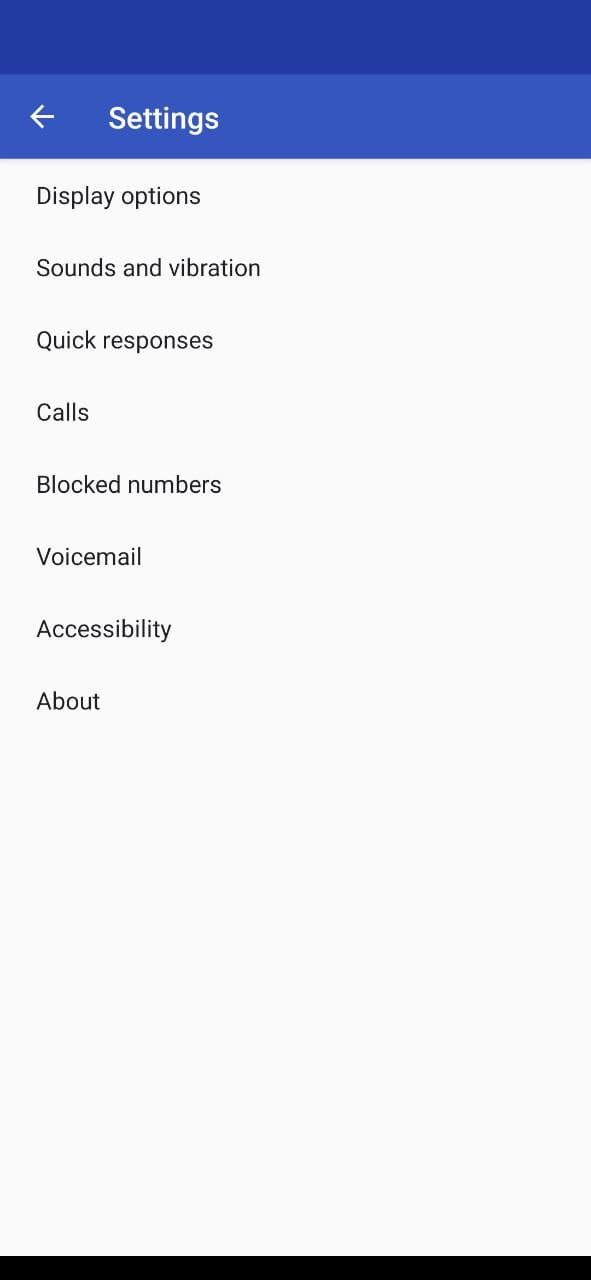
Select Calls from the Settings menu.
How to make Android VoIP Calls with Telnyx: Screen Capture: Android Phone: Step 2 -
Select Calling accounts from the Call settings menu.
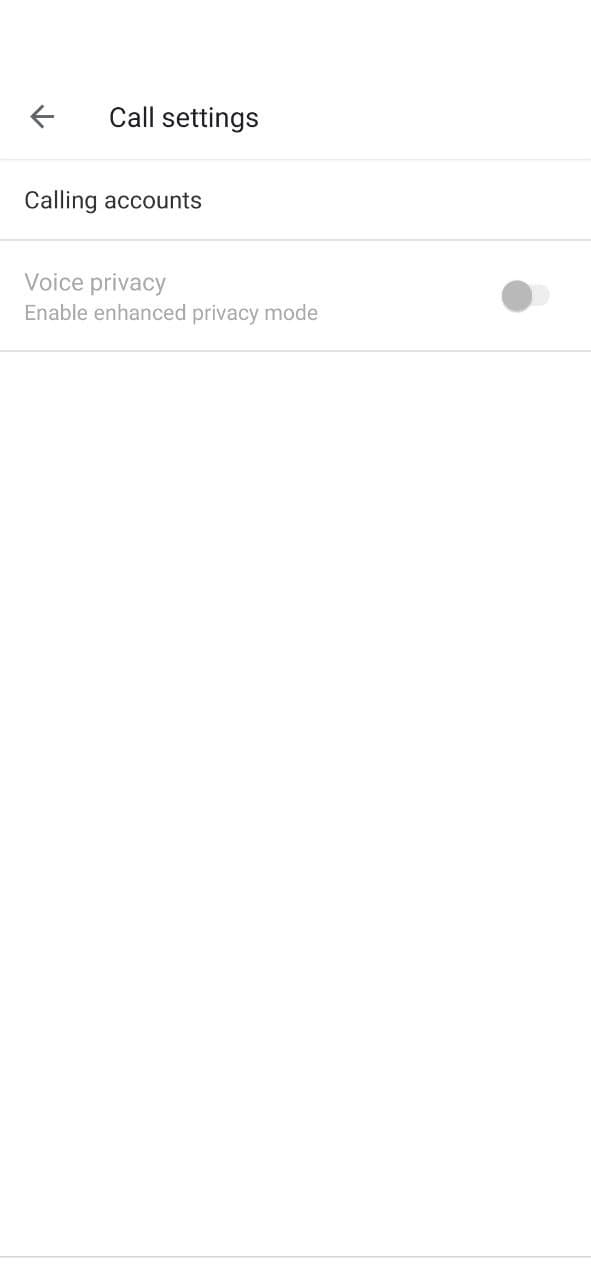
How to make Android VoIP Calls with Telnyx: Screen Capture: Android Phone: Step 3 -
Select SIP accounts from the Call accounts menu.
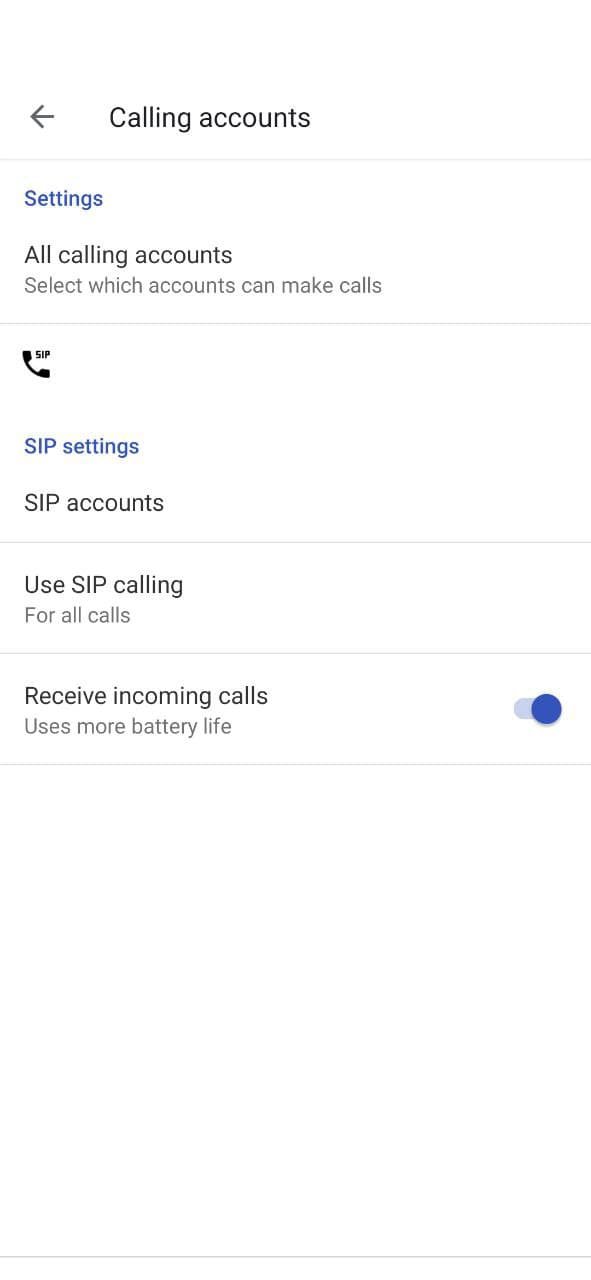
How to make Android VoIP Calls with Telnyx: Screen Capture: Android Phone: Step 4 -
Tap the + icons from SIP accounts.
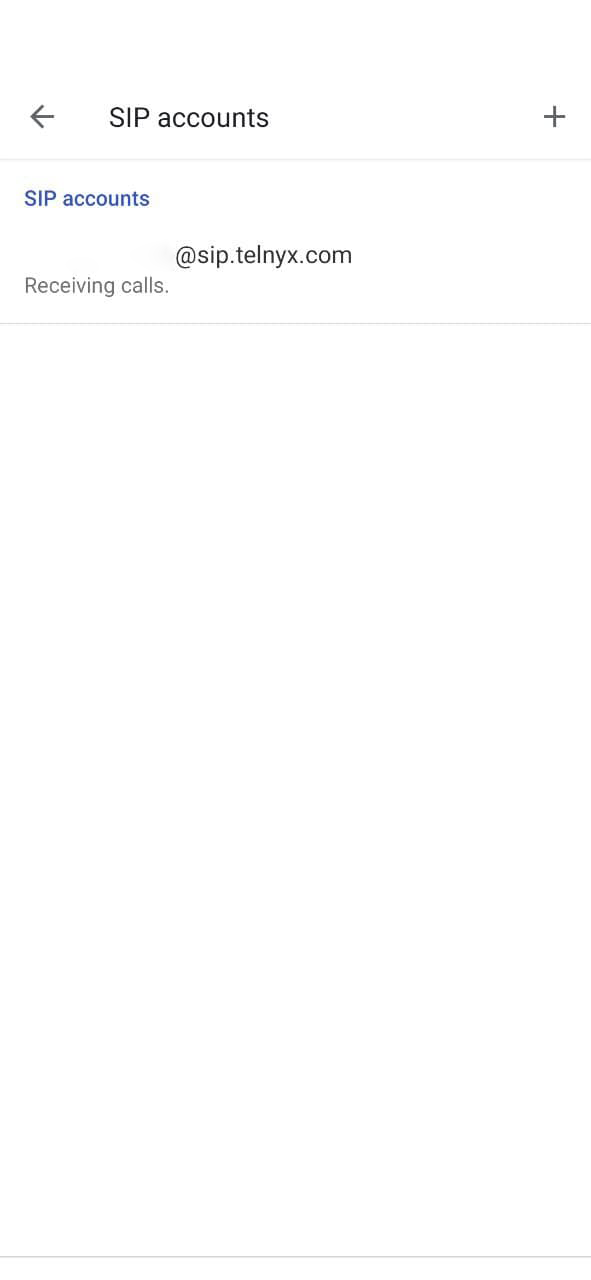
How to make Android VoIP Calls with Telnyx: Screen Capture: Android Phone: Step 5 -
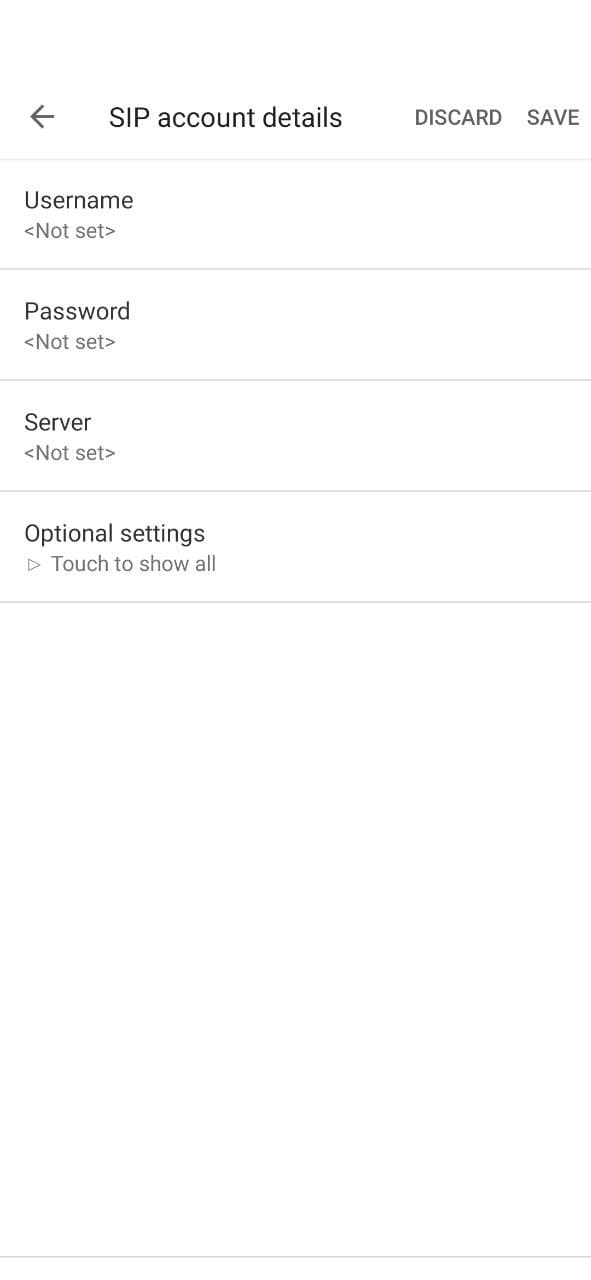
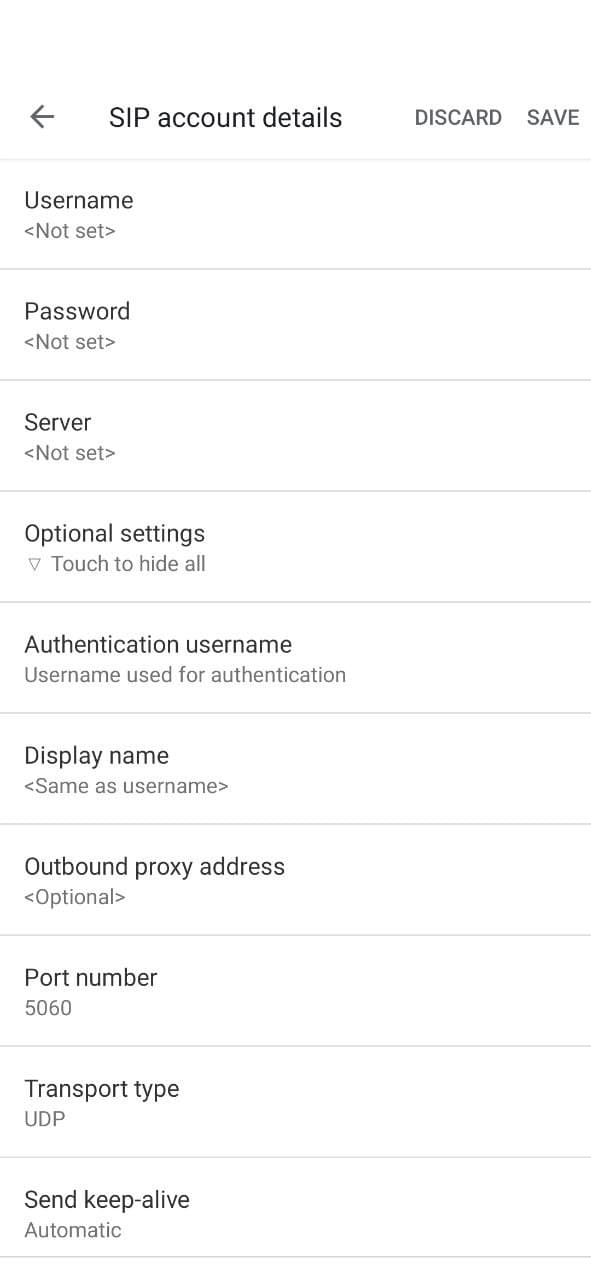
Enter SIP account details. Use the username and password we got from
Telnyx. Next for the server, enter sip.telnyx.com. If
you are using Twilio or another service, check docs for the server to
enter here. Then tap Optional settings.
How to make Android VoIP Calls with Telnyx: Screen Capture: Android Phone: Step 6 -
Enter these optional account details:
- Authentication username:
- Username from Telnyx (again)
- Display name:
- Your Telnyx VoIP number in international format, starting with a '+' (e.g. +445566777888)
- Port number:
- 5060
- Transport type:
- UDP
How to make Android VoIP Calls with Telnyx: Screen Capture: Android Phone: Step 7 -
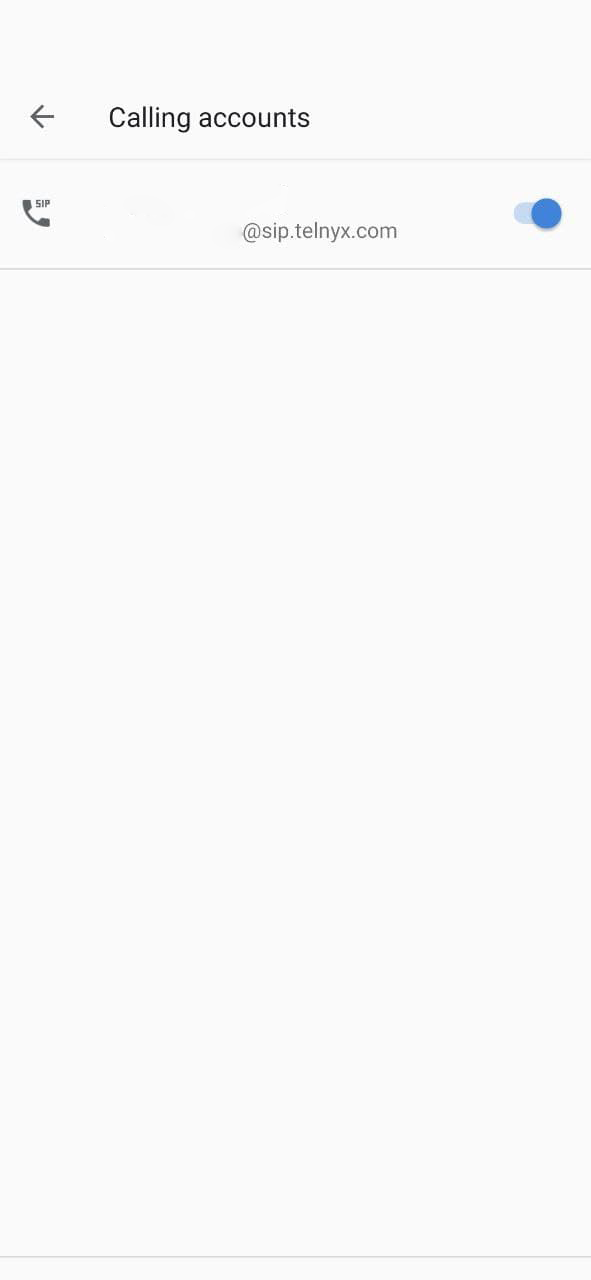
Go back until you get to Calling accounts and make sure this
account is enabled for making calls.
How to make Android VoIP Calls with Telnyx: Screen Capture: Android Phone: Step 8 -
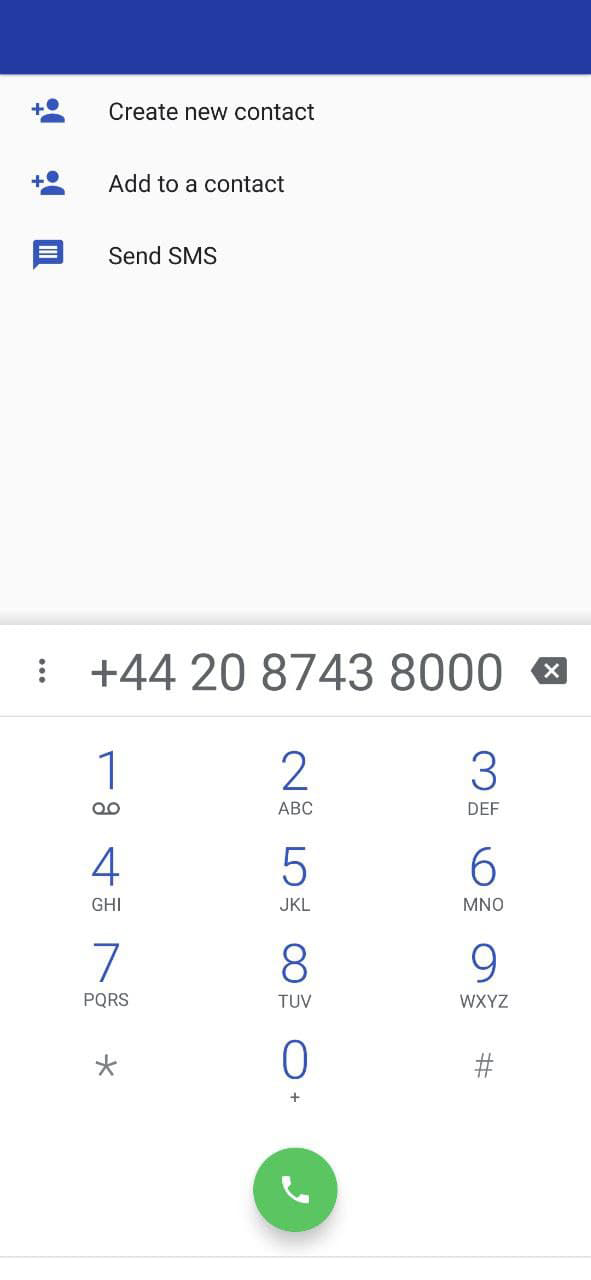
Dial a number ready to make a test call. This is no different to how you
would previously have dialled out.
How to make Android VoIP Calls with Telnyx: Screen Capture: Android Phone: Step 9 -
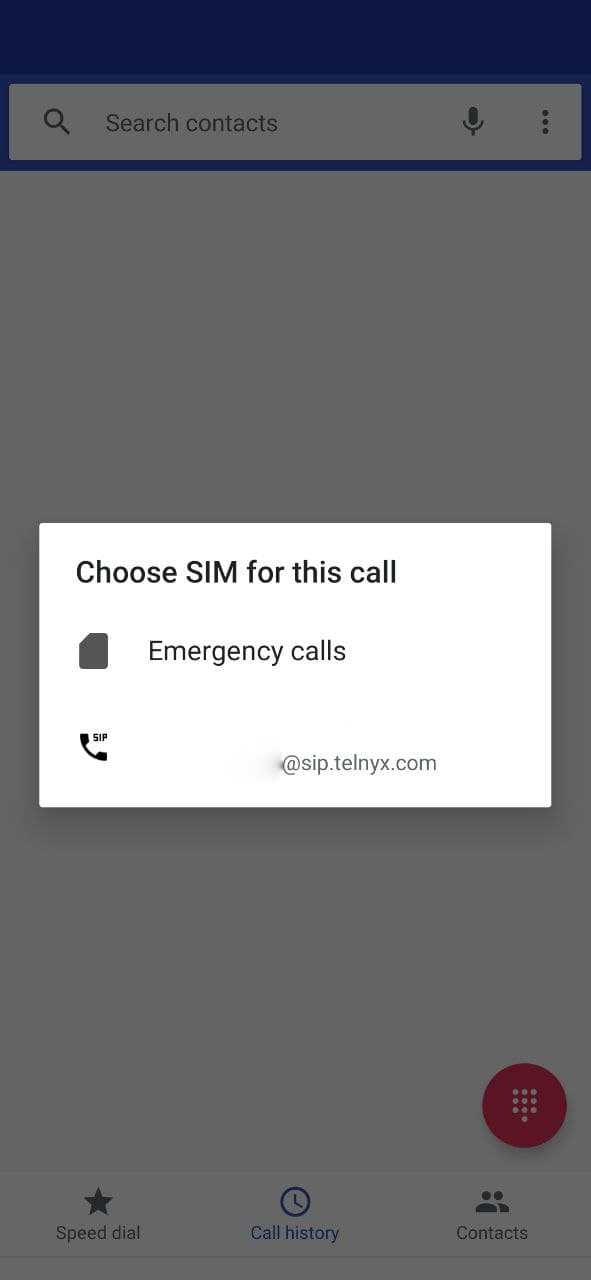
When you press the call button, you should get the option to choose
between the SIM and the new SIP account. Select the new SIP account to
connect the call.
How to make Android VoIP Calls with Telnyx: Screen Capture: Android Phone: Step 10


🙌🏽 How to make Android VoIP Calls: What we Learned #
In this post, we learned:
- how using VoIP to place and receive calls on your Android phone can increase privacy;
- setting up a Telnyx account for use with Android SIP; and
- how to configure an Android phone to make VoIP calls using Telnyx credentials.
I really do hope you found this content useful. If you did and would like to see similar content, do let me know. Also, keen to hear enhancements of the techniques listed here for increased privacy and security.
🙏🏽 How to make Android VoIP Calls: Feedback #
Have you found this content useful? Would you like to see posts on another topic instead? Get in touch with ideas for new posts. Also, if you like my writing style, get in touch if I can write some posts for your company site on a consultancy basis. Read on to find ways to get in touch, further below. If you want to support posts similar to this one and can spare a few dollars, euros or pounds, please consider supporting me through Buy me a Coffee.
Finally, feel free to share the post on your social media accounts for all your followers who will find it useful. As well as leaving a comment below, you can get in touch via @askRodney on Twitter and also askRodney on Telegram . Also, see further ways to get in touch with Rodney Lab. I post regularly on Web development as well as online privacy. Also, subscribe to the newsletter to keep up-to-date with our latest projects.