


☁️ SvelteKit Node App Deploy #
In this post, we look at the SvelteKit node app deploy process. That is how you can build and serve your SvelteKit app on Linux cloud hosting. You might ask why run your own self-managed Linux server, going for cloud hosting, rather than using serverless? Well, node does not enjoy widespread support on serverless-based offerings yet your SvelteKit app might need to run in a node environment. In the example we look at, we use the sharp package to resize images and also to generate next-gen format images on our server. This would not be possible with many serverless hosting providers.
OK, but why not run node on a Hosting Provider? #
There are also services which can host and manage node apps for you. Why not use one of those? The answer is pricing and flexibility. For our use case, we might be able to find such a host which offers what we need cheaper than Linode (the Linux cloud self-managed provider we opt for). However, for another app, if you need to add a database or run Redis for caching on the server, typically you incur extra costs with a hosted solution. With Linode and similar, self-managed services, there will be no additional cost. You just need to make sure your self-hosted Linux box has enough CPU-power and memory to run everything you are asking of it.
Keeping things ticking over #
That said, it’s not all sunshine and rainbows! Self-hosting means you need to configure packages yourself and keep the machine up-to-date. This needs a bit of Linux knowledge. This extends to setting up SSL certificates and such like. However, we will see, setting up a reverse proxy with nginx, we can have Cloudflare generate the certificates for us. We will use a configuration which lets public users connect via the Cloudflare public domain, keeps the Linux box IP address private and only allows SSL connections into the Linux box from Cloudflare (so the public cannot bypass Cloudflare).
That might sound a little complicated, but we shall see if you have a little previous Linux experience, it shouldn’t be too hard to follow along. If that all sounds exciting, then let’s get going!
🧱 What are we Building? #
Please enable JavaScript to watch the video 📼
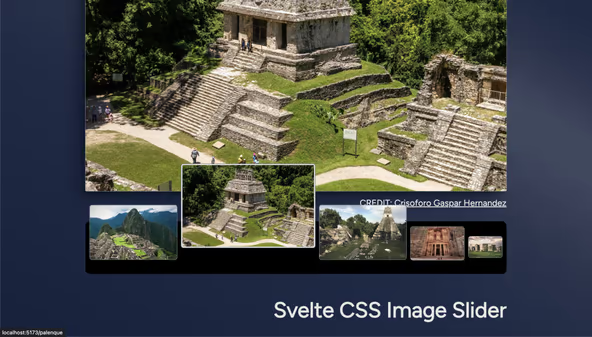
We will host the same node app we created in the Svelte CSS Image Slider post. It uses the sharp package to generate images from a server endpoint. This
makes it a great example to deploy to a node server. Instead of using DevOps

We will first update the SvelteKit app, adding some Content Security Policy features and HTTP security headers. Then, we make a Linode account, and create a machine, adding node, nginx and pm2. Finally, we configure everything and serve the app.
🚀 SvelteKit Node App Deploy: Getting Started #
Let’s start by opening up the app from the earlier previous post. If you didn’t follow along on that one you can just clone the GitHub repo:
git clone https://github.com/rodneylab/sveltekit-css-hover-image-slider.gitcd sveltekit-css-hover-image-sliderpnpm installpnpm dev
If you just cloned the app, it already contains the changes in the rest of this section, just read the explanations. You only need to update the code if you are carrying on from the previous post.
Start by updating svelte.config.js in the project
root folder:
1 import adapter from '@sveltejs/adapter-node';2 import preprocess from 'svelte-preprocess';3 import cspDirectives from './csp-directives.mjs';4 5 /** @type {import('@sveltejs/kit').Config} */6 const config = {7 // Consult https://github.com/sveltejs/svelte-preprocess8 // for more information about preprocessors9 preprocess: preprocess({ postcss: true }),10 11 kit: {12 adapter: adapter({ precompress: true }),13 csp: {14 mode: 'hash',15 directives: cspDirectives16 }17 }18 };19 20 export default config;
Here we set up SvelteKit to use the node adapter. As well as that, in lines 13 – 16, we add Content
Security Policy (CSP) hashes. CSP directives help protect sites from cross
site scripting (XSS) attacks. These are where a nefarious actor might inject
malicious code into the site before it arrives in the end user browser.
SvelteKit can automatically generate hashes or nonces which the user browser checks against the actual code it receives. If things do
not check out the browsers can block the potential threat. We go for hashes instead
of nonces because every visitor to the site will see the same content, and we want
to cache it. Nonces are cheaper to generate, but should not be reused across requests.
You can see more on CSP directives and XSS attacks in the post on SvelteKit Content
Security Policy.
CSP Directives Config File #
Next, we can add the csp-directives.mjs file referenced
in the svelte.config.js file above:
csp-directives.mjs — click to expand code.
const cspDirectives = { 'base-uri': ["'self'"], 'child-src': ["'self'"], 'connect-src': ["'self'", 'ws://localhost:*'], // 'connect-src': ["'self'", 'ws://localhost:*', 'https://hcaptcha.com', 'https://*.hcaptcha.com'], 'img-src': ["'self'", 'data:'], 'font-src': ["'self'", 'data:'], 'form-action': ["'self'"], 'frame-ancestors': ["'self'"], 'frame-src': [ "'self'" // "https://*.stripe.com", // "https://*.facebook.com", // "https://*.facebook.net", // 'https://hcaptcha.com', // 'https://*.hcaptcha.com', ], 'manifest-src': ["'self'"], 'media-src': ["'self'", 'data:'], 'object-src': ["'none'"], 'style-src': ["'self'", "'unsafe-inline'"], // 'style-src': ["'self'", "'unsafe-inline'", 'https://hcaptcha.com', 'https://*.hcaptcha.com'], 'default-src': [ 'self' // 'https://*.google.com', // 'https://*.googleapis.com', // 'https://*.firebase.com', // 'https://*.gstatic.com', // 'https://*.cloudfunctions.net', // 'https://*.algolia.net', // 'https://*.facebook.com', // 'https://*.facebook.net', // 'https://*.stripe.com', // 'https://*.sentry.io', ], 'script-src': [ 'self' // 'https://*.stripe.com', // 'https://*.facebook.com', // 'https://*.facebook.net', // 'https://hcaptcha.com', // 'https://*.hcaptcha.com', // 'https://*.sentry.io', // 'https://polyfill.io', ], 'worker-src': ["'self'"]};export default cspDirectives;
This config works fine for this app. For your own app, you will almost certainly need to adjust the config. Test CSP directives attentively as they can completely block access to your site. It is also worth using them in conjunction with reporting, so you are more likely to find out about something going wrong with the config. Sentry offer free reporting. If you have not used CSP directives before, it might be prudent to limit using them to pet projects.
HTTP Security Headers #
SvelteKit lets us specify HTTP security header in the src/hooks.server.ts files
src/hooks.server.ts — click to expand code.
import type { Handle } from '@sveltejs/kit'; export const handle: Handle = async function handle({ event, resolve }) { const response = await resolve(event); response.headers.set('X-Frame-Options', 'SAMEORIGIN'); response.headers.set('Referrer-Policy', 'no-referrer'); response.headers.set( 'Permissions-Policy', 'accelerometer=(), autoplay=(), camera=(), document-domain=(), encrypted-media=(), fullscreen=(), gyroscope=(), interest-cohort=(), magnetometer=(), microphone=(), midi=(), payment=(), picture-in-picture=(), publickey-credentials-get=(), sync-xhr=(), usb=(), xr-spatial-tracking=(), geolocation=()' ); response.headers.set('X-Content-Type-Options', 'nosniff'); // response.headers.set('Strict-Transport-Security', 'max-age=31536000; includeSubDomains; preload'); return response;};
You will probably need to tweak the Permissions Policy here for your own projects. When we serve this HTTP header, the browser checks the
policy before allowing access to the camera, for example. The X-Frame Options helps
protect against clickjackingReferrer-Policy limits the information sent on,
when the user navigates to another website.

We can also set HTTP headers on the Linux box in the nginx config. In fact, we
will set Strict-Transport-Security there, so it
is commented out above.
☑️ Local test build #
Once you are happy with the configuration, you can run a local test build:
pnpm build
This will build a standalone app, to the build directory.
The app will run in node. To test it, run:
PORT=4173 node build
By default, it will run on port 3000 so if you already
have something running there, add the PORT=4173 variable ahead of the node command, like we have above. If all is well, create
a git repo and push the code to your GitHub, GitLab or other git service. We will
clone from there onto our self-managed Linux box later.
🌩 Create Linode Volume #
We are all set to go cloud-side now. If you do not yet have a Linode account, you can create one for free . If you are a Syntax podcast listener, get a special deal, using the link they include in Linode-sponsored episodes. You will get an initial credit which will covers hosting initially. Do not forget to switch your box off if you are just testing a pet project, so you do not get a surprise bill when credit runs out!
Now you have a Linode account, create a new Linux server instance . From the options, I chose the following:
- Image: Ubuntu 22.04 LTS,
- Region: choose one which makes sense for you,
- Linode Plan: Shared CPU / Nanode 1GB,
- Add-ons: I did not select anything here

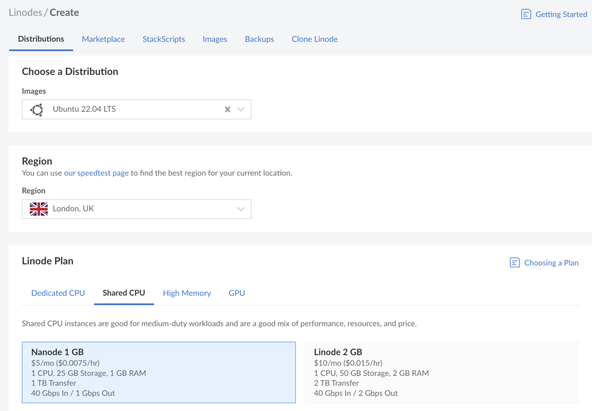
Feel free to customize to your own tastes, though if you pick another Linux distribution, the commands, and instructions may differ from the ones I tested below.
Next, create an SSH key locally then copy the public key. Select Add an SSH key and paste the
public key into the SSH Public Key box which appears. Add a suitable
Label too. Unfortunately, I wasn’t able to make a secure key SSH key (e.g. ed25519-sk)
work. You should be able to use a regular rsa, ecdsa, ed25519 key though.
Finally, click the Create Linode button at the bottom of the window.
🗳 Poll #
🛠 Linux Server Setup #
It will take a few minutes for the server to spin up. Go to the Linodes section of the console to see your new instance details . This will list the IP address. For convenience, you might want to add this
to the ~/.ssh/config file on your system:
1 Host linode2 Hostname 111.222.222.1113 User root4 ControlMaster no5 IdentitiesOnly no8 IdentityFile ~/.ssh/path-to-your-new ssh-key9 10 Host *11 AddressFamily inet12 HashKnownHosts yes13 VisualHostKey yes14 PasswordAuthentication no15 ChallengeResponseAuthentication no16 StrictHostKeyChecking ask17 VerifyHostKeyDNS yes18 ForwardAgent no19 ForwardX11 no20 ForwardX11Trusted no21 ServerAliveInterval 30022 ServerAliveCountMax 223 KexAlgorithms [email protected],diffie-hellman-group-exchange-sha256
Replace the IP address in the Hostname field (line 2) with the actual IP address of your self-hosted Linux server (from the
Linode console). Also, update the path to your SSH private key in line 8.
Finally, try connecting to the box, from the Terminal:
ssh linode

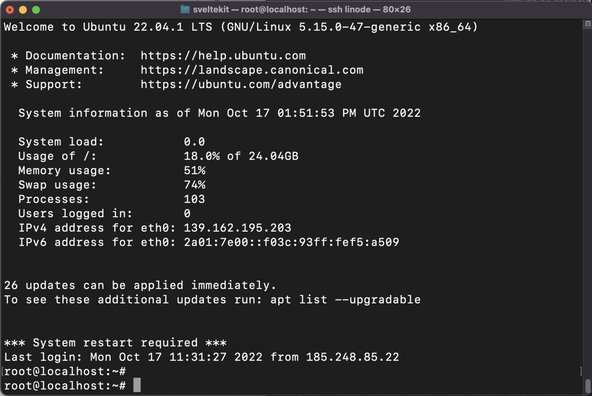
💫 System Update #
Next, let’s update the system and add the packages we need:
sudo apt updatesudo apt upgradesudo apt install nginx ufw
Then, we can install the LTS version of node. The other packages were already in the apt package repository, but the node version in apt is probably quite old. We can add a current LTS version to the apt repo by running this command:
curl -fsSL https://deb.nodesource.com/setup_lts.x | sudo -E bash -
Check this command against the node docs to reassure yourself it is safe to run a shell script. Finally, we can have apt install node for us:
sudo apt-get install -y nodejs
🔥 Firewall Config #
We will use Universal firewall as it is fairly straightforward to configure. I would also recommend using the firewall on the Linode console. This protects you if for some reason ufw stops. Anyway, for ufw run:
ufw allow sshufw app list
This should have enabled ufw for ssh, which we need to connect to the box. Then the second command listed the apps available. I got:
Available applications: Nginx Full Nginx HTTP Nginx HTTPS OpenSSH
we will go for 'Nginx Full'. Only Cloudflare will be able to establish http connections, and it will use TLS. Select this option from the Terminal:
sudo ufw allow 'Nginx Full'sudo ufw enablesudo ufw status
With the Firewall configured, let’s set up nginx.
🚒 nginx config #
nginx is a web server. You might ask why we need this since locally, we just
ran node build and the app was available on port
4173. The reason is we don’t want public
visitors to connect to the self-managed Linux server directly. This helps us
with security.
We will set up a domain on Cloudflare. The visitors will connect to Cloudflare and Cloudflare will pass the request on to our box. Our self-managed Linux server will then pass the request to the SvelteKit app running locally and relay the response to Cloudflare. nginx is the middle man here. Essentially providing a pipe to connect Cloudflare with our SvelteKit node app. The configuration we opt for is known as a reverse proxy.
Reverse Proxy Configuration #
To start, let’s make an nginx config file. Update the domain from example.com to your actual domain, this will help you identify the right config if you have multiple sites on your box later:
sudoedit /etc/nginx/sites-available/example.com
This used nano as the default editor, which (strangely) I found difficult now I use vim most of the time. Feel free to open in vim if you find that easier to use! Either way, add this content:
1 proxy_cache_path /data/nginx/cache levels=1:2 keys_zone=STATIC:10m inactive=24h max_size=1g;2 3 server {4 listen 80;5 listen [::]:80;6 server_name example.com;7 return 302 https://$server_name$request_uri;8 }9 10 server {11 listen 443 ssl http2;12 listen [::]:443 ssl http2;13 14 ssl_certificate /etc/ssl/cert.pem;15 ssl_certificate_key /etc/ssl/key.pem;16 ssl_client_certificate /etc/ssl/authenticated_origin_pull_ca.pem;17 18 ssl_session_timeout 1d;19 ssl_session_cache shared:MozSSL:10m;20 ssl_session_tickets off;21 22 ssl_protocols TLSv1.3;23 ssl_prefer_server_ciphers off;24 25 add_header Strict-Transport-Security "max-age=63072000" always;26 27 # OCSP stapling28 ssl_stapling on;29 ssl_stapling_verify on;30 ssl_trusted_certificate /etc/ssl/origin_ca_ecc_root.pem;31 32 ssl_verify_client on;33 34 server_name example.com;35 server_tokens off; # hide nginx version36 37 location / {38 proxy_set_header X-Real-IP $remote_addr;39 proxy_set_header X-Forwarded-For $proxy_add_x_forwarded_for;40 proxy_set_header Host $host;41 proxy_buffering on;42 proxy_cache STATIC;43 proxy_cache_valid 200 1d;44 proxy_cache_use_stale error timeout invalid_header updating http_500 http_502 http_503 http_504;45 proxy_pass http://localhost:3000/;46 }47 }
- The first line adds a static cache for performance , this is fine for our app, but you might want to remove it if you have a Server-Side Rendered app with personalized content.
-
in lines
3–8: we redirect any HTTP request to HTTPS requests, for security,
The remaining code handles SSL requests.
-
in lines
14–16we add links to the SSL certificates. We will get those from Cloudflare in the next section, -
lines
18–32list further security features. These mostly originate from the Mozilla SSL Configuration Generator tool , -
finally the code in lines
36–46is setting up our reverse proxy. Essentially, any incoming requests to paths starting ‘/’ (which will be any request for our app), will get passed tohttp://localhost:3000. Remember,3000is the default port the SvelteKit node app runs on.
Enabling the Site #
We added that file to sites-available. To
enable it, we can create a symbolic link to that file within the adjacent sites-enabled folder:
sudo ln -s /etc/nginx/sites-available/example.com /etc/nginx/sites-enabled/sudo rm /etc/nginx/sites-enabled/default
There was already a /etc/nginx/sites-enabled/default file for me, which I deleted. That was so that nginx uses our new file instead
of the default.
😶🌫️ Cloudflare Config #
We’re assuming you already own the domain you want to use and have it setup in Cloudflare Registrar. I think you can buy domains directly in Cloudflare now. An alternative is to use a service like Hover, normally their pricing (for buying domains) is quite reasonable. Once you buy the domain there, you have to wait a certain period before you can transfer it into Cloudflare (60 days comes to mind), but it is worth setting a calendar reminder, as you will probably save a bit on annual renewals.
SvelteKit Node App Deploy: Cloudflare DNS #
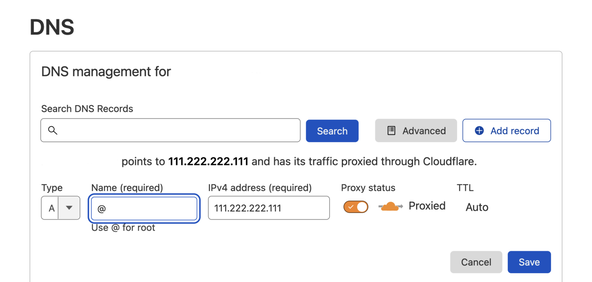
Anyway, first we will add an A Record in the Cloudflare DNS
From the Cloudflare dashboard , choose Websites then click the domain your site will be hosted on. Then select DNS from the menu, and Add Record. Ensure the proxy is enabled with Proxied displayed in the Proxy status column (as in screenshot). The IP address here is that of your Linux box.

SvelteKit Node App Deploy: SSL Certificates #
Cloudflare generates the SSL certificates for us (needed for /etc/ssl/cert.pem and /etc/ssl/key.pem) which we saw in the
nginx config file. We also had a couple more files in there. /etc/ssl/authenticated_origin_pull_ca.pem is a trusted Cloudflare certificate. Including this tells nginx only to accept
connections from servers with certificates issues by this certificate authority.
Essentially, this limits us to accepting connections from Cloudflare only, into
nginx. Remember, public visitors will connect to Cloudflare and our reverse proxy
looks after their request from that point on. Finally, we had /etc/ssl/origin_ca_ecc_root.pem which is used for OCSP
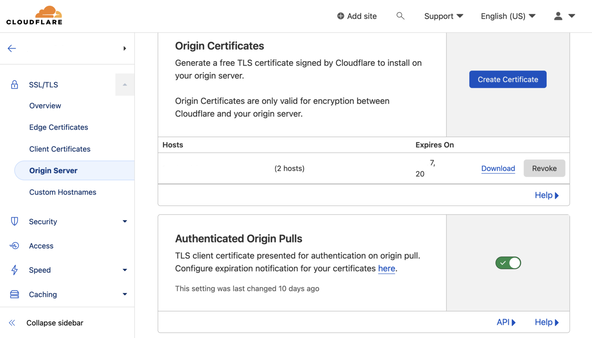
Let’s start with the first two. Go to SSL/TLS and select
Origin Server from the submenu. Then click Create Certificate. We will use Generate private key and CSR with Cloudflare.
Choose from RSA or ECC and add hostnames in the box (e.g. *.example.com example.com). Finally, click Create. Your new certificates will be displayed. Keep the default PEM format. Copy
the contents from Origin Certificate (including -----BEGIN CERTIFICATE----- and -----END CERTIFICATE-----) and paste
them into a new file on the Linux self-managed server: /etc/ssl/cert.pem. Make sure there are no extra empty lines at the start or end of the file.
Then copy the contents of Private Key to /etc/ssl/key.pem. Check Cloudflare docs for further details .

Authenticated Origin and OCSP Stapling #
Next, make sure Authenticated Origin Pulls is selected. You can
download the Authenticated Origin Pull Certificate from Cloudflare authenticated_origin_pull_ca.pem . Lookup a link in official Cloudflare docs if you prefer. You can download
directly to the box:
curl -LO https://developers.cloudflare.com/ssl/static/authenticated_origin_pull_ca.pemsudo mv authenticated_origin_pull_ca.pem /etc/ssl/.
Then, you can download the certificate used for OCSP stapling:
curl -LO https://developers.cloudflare.com/ssl/static/origin_ca_ecc_root.pemsudo mv origin_ca_ecc_root.pem /etc/ssl/.
Finally, make the directory we gave for caching in the nginx config and check the nginx config is good:
mkdir -p /data/nginxnginx -t
Now check if nginx is already running:
systemctl status nginx
If it is running, restart it:
sudo systemctl restart nginx
Otherwise, start and enable it (so it restarts automatically if the machine reboots):
sudo systemctl enable nginxsudo systemctl start nginx
That’s the Cloudflare setup complete. Next, we spin up the app.
♥️ SvelteKit Time #
Clone the repo from your GitHub (update the URL unless you want to clone the Rodney Lab one):
git clone https://github.com/rodneylab/sveltekit-css-hover-image-slider.gitcd sveltekit-css-hover-image-slidernpm installnpm run build
Although I normally prefer pnpm, I have just opted for npm command here as it is already installed and the internet connection should be pretty fast anyway!
npm i pm2 -gpm2 start build/index.js --name svelte-app
This should install pm2 and start the app running. To check, run pm2 ls. You should see something like this:

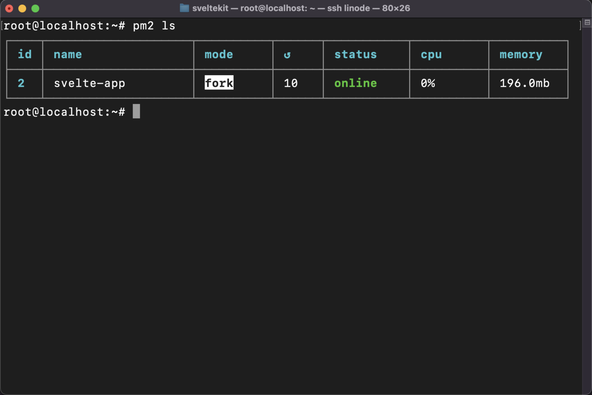
Also try running:
curl -L https://127.0.0.1:3000
if you need to debug. This will print the page HTML to the Terminal if the app is up and running.
For your e2e user test, you can open your site in the browser from the public
URL (using the domain name) and hopefully all is well for you! Also try
connecting from your browser to the IP address of the self-managed Linux
server (e.g. https://111.222.222.111). I get a 400: No required SSL certificate was sent error. This suggests the public will not be able to access the directly: exactly
what we want.
💫 SvelteKit Node App Deploy: Updates (Continuous Integration) #
Like your serverless apps, you can update the repo locally and then push to your git repo. After that, you will probably want to SSH in and run this sequence of commands:
cd sveltekit-css-hover-image-slidergit pullnpm run buildpm2 restart svelte-appsudo rm -r /data/nginx/cache/*sudo systemctl restart nginx
This clears the nginx cache and restarts nginx to make sure everything is consistent.
💯 SvelteKit Node App Deploy: Testing #
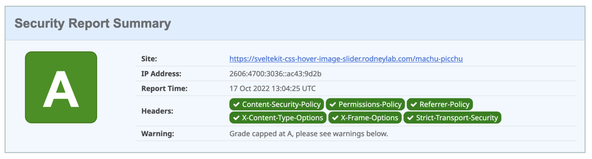
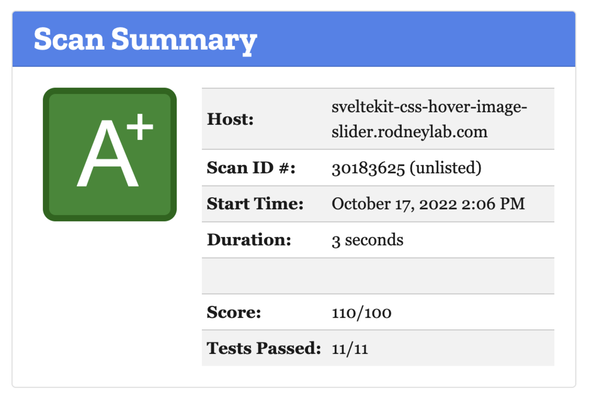
We checked the page works at the end of a previous section. You might also
want to check the HTTP security headers. Both SecurityHeaders.com and Mozilla Observatory are good for this. You might not be able to get an A+ on both because SvelteKit
does not add style CSP hashes (at the time of writing). Instead, we used the style-src: unsafe-inline directive. CSS hashes are important, though; maliciously injected CSS could hide
an important warning you included in your site.

🙌🏽 SvelteKit Node App Deploy: Wrapping Up #
In this post, we saw the SvelteKit node app deploy process. In particular, we saw:
- how to configure HTTP headers in SvelteKit,
- how to use Cloudflare to stop the public accessing the self-managed Linux server,
- a possible nginx configuration considering security.
Please see the full repo code on the Rodney Lab GitHub repo . Hope you have found this post on the SvelteKit node app deploy process useful and learned at least one thing. Please let me know about any possible improvements to the content above.
🏁 SvelteKit Node App Deploy: Summary #
How can you set HTTP headers in SvelteKit? #
- For a SvelteKit SSR app, you can set HTTP headers in the `src/hooks.server.js` or similar TypeScript file. This will not do anything if you are running the static adapter, as SvelteKit does not run on the server. For SSR, however, you can set common HTTP security headers like Referrer Policy, X-Content-Type-Options, X-Frame-Options and Strict-Transport-Security. You can also set Permissions Policy headers.
How do you set Content Security Policy headers in SvelteKit? #
- SvelteKit can automatically generate hashes or nonces for inline JavaScript on your site. This can help protect against XSS (cross site scripting) attacks. Nonces are cheaper to compute and more suited to SSR servers, which might generate unique content for each user. You should not reuse the nonces over different requests. Hashes are great for static content. They take a little longer to generate, but can be more secure and can be reused over requests as long as the content does not change.
Should you use ufw or Linode inbuilt firewall? #
- Using both is a good idea. The Linode firewall is external to your self-hosted box, so even is an adversary compromises your system and disables ufw (or similar), you will get some protection from the Linode firewall. You might get finer grain control using ufw or equivalent, though.
🙏🏽 SvelteKit Node App Deploy: Feedback #
If you have found this post useful, see links below for further related content on this site. I do hope you learned one new thing from the video. Let me know if there are any ways I can improve on it. I hope you will use the code or starter in your own projects. Be sure to share your work on Twitter, giving me a mention, so I can see what you did. Finally, be sure to let me know ideas for other short videos you would like to see. Read on to find ways to get in touch, further below. If you have found this post useful, even though you can only afford even a tiny contribution, please consider supporting me through Buy me a Coffee.


Just dropped a new post taking you through the deploy phase of getting your SvelteKit node app running on self-managed Linux server.
— Rodney (@askRodney) October 19, 2022
we use
- pm2 to run the app
- nginx as a caching reverse proxy
- Cloudflare SSL certificates
Hope you find it useful!
https://t.co/fpKiU2swi1
Finally, feel free to share the post on your social media accounts for all your followers who will find it useful. As well as leaving a comment below, you can get in touch via @askRodney on Twitter and also askRodney on Telegram . Also, see further ways to get in touch with Rodney Lab. I post regularly on SvelteKit as well as Search Engine Optimization among other topics. Also, subscribe to the newsletter to keep up-to-date with our latest projects.