


🚀 What is Astro? #
The meteoric rise of Astro adoption recently has put it in the same constellation as well-loved tooling, such as Next.js and Svelte. Use of web standards and allowing developers to use their favourite framework (React, Svelte and Vue among others) and focus on performance is probably behind the of Astro’s ascent.
Astro lets you build fast apps with minimal JavaScript writing your code in HTML and vanilla JavaScript, React, Svelte or any mixture of those or a number of other languages. It is already clear Astro is quite different to Next.js or SvelteKit. Astro has its own Go compiler and uses Vite tooling under the hood. This allows for a modern and more importantly fast developer experience.
As well as partial hydration, Astro offers an islands architecture. Don’t worry if you don’t yet know exactly what those terms mean; we will talk about the next. In short, Astro makes your app pages load faster. You get control of how your components load. You can instruct the browser to load a video part way down the page only when visible. Or the browser can work on your analytics code only when the main thread is idle (so we can optimize user experience) and you can even set certain components only to load on mobile or desktop. Now you see how different Astro is to other tools, let’s take a deeper dive into the terms we introduced and how you can start using Astro.
🧊 What is Partial Hydration? #
Although partial hydration sounds like some marketing hype, which you might find on a new gym training supplement, it is actually a smart and effective idea. Essentially, you send your page from the server to the client initially as HTML only. By default, Astro ships zero JavaScript. This is the secret to Astro’s speed. From your JavaScript 101 course, though, you will remember it is the JavaScript which makes your page interactive. That's where hydration comes in; hydration is the process of loading the JavaScript on your site page, which manages state.
What if your site does not need to be interactive? You might have an FAQ page which just contains questions and answers with no forms, video, or anything interactive which needs JavaScript. That’s fine, we serve our page as pure HTML and never need to hydrate it. Astro is great for this kind of content. What if you wanted to add a comments section at the bottom of the page? Now you require JavaScript, but in fact you only require it once the user scrolls down to the bottom of the page. Astro can hydrate that comment form at the optimum time, again allowing your page to load quickly. Astro only hydrates the parts of the page which require hydration. This is partial hydration.
SEO Benefits #
As well as user experience benefits, Astro has Search Engine Optimization (SEO) advantages. With full hydration, essentially nothing is interactive until everything is interactive, and the server ends up sending a larger bundle to the browser and rehydration can heavily delay time-to-interactive . This can impact first input delay, one of Google's Core Web Vitals statistics. It is vastly more expensive to download and run JavaScript than simple HTML . Limiting JavaScript to the pages or parts of pages that need it should mean search engines like Google can crawl more content from your site in the time window allotted to you.
🏝 What is an Islands Architecture? #
Islands architecture relates to the partial hydration technique we just looked at. Astro’s philosophy is to create Islands of Interactivity which the browser can hydrate independently. Treating each interactive element as independent allows you to optimize how it loads. For Core Web Vitals you will want a banner image at the top of the page to load instantly. You could go for pure HTML, but showing a low resolution placeholder, while you wait for the responsive image to load reduces cumulative layout shift. In summary, typically you want your banner image to load instantly. That is not the same for an image or video halfway down the page. We can load these as they come into view. Remember, with partial hydration, we ship just the JavaScript we need.
Another island of interactivity might be an image carousel. What if you have different carousel components for mobile and desktop? With islands architecture, you can load the specific one you require, and forget the other. What about the chatbot that helps users with potential issues? Why not wait until the main thread is idle and then load it? All of these use cases result in your server shipping less code and the browser loading less code at a time, leading to increased efficiency.
😕 Why use Astro? #
- it is fast — you get better user experience and expect a SEO boost as a bonus,
- you can use a language you already know, React, Svelte, Vue, Markdown or plain HTML,
- you can mix components from different languages, letting you gradually pick up Svelte.
Astro however, is not a one size fits all solution. It excels at building static sites, though will not be ideal when you really need a server side rendered app. As an example, let’s say you were rebuilding X. A static site does not fit this use case, since you cannot fully customize for each user with a static model. Don’t, however, interpret this to mean that you cannot have JavaScript or interactivity on a static site. You can still have a contact form or interactive feedback elements, the difference is that it becomes harder to customize them completely for a logged-in user.
🧱 How do you Create a Minimal Astro App? #
Please enable JavaScript to watch the video 📼
Blasting off on your new Astro project is as simple as typing a few commands
to fire up the CLI and selecting Empty when prompted. Add more
to the react and svelte integrations, or remove any you won’t use:
pnpm create astro@latest my-new-projectcd my-new-projectpnpm astro telemetry disablepnpm astro add react sveltepnpm run dev
During this setup process, you can alternatively choose from a list of Include example files or Use blog template for your launchpad. We disable telemetry
here, but you can skip that line if you want to keep data collection enabled.
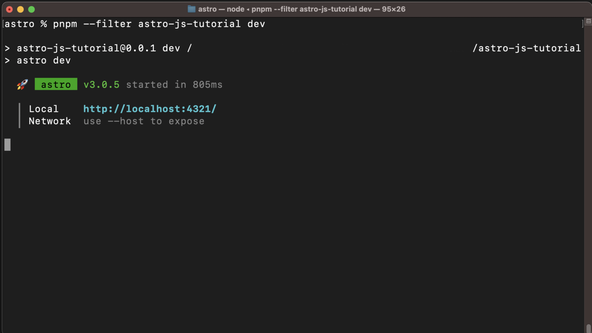
By default, Astro will start up on TCP port 4321 but don't worry if you already have something running there, it should be able
automatically to find another available post. The CLI will tell you which port
it settles for:

🧐 Getting Started with Astro: What’s Inside? #
..├── README.md├── astro.config.mjs├── package.json├── pnpm-lock.yaml├── public│ ├── favicon.ico│ └── robots.txt├── sandbox.config.json└── src └── pages └── index.astro
-
The
README.mdfile contains some tips on getting going, eventually you will replace it with your project's own documentation. -
astro.config.mjsis the main Astro config file. To use React or Svelte components in our project, we will need to install the React integration (@astrojs/react) or Svelte renderer (@astrojs/svelte) and include whichever (or both) in the integrations array of this config file:astro.config.mjsjavascript1 import { defineConfig } from 'astro/config';23 import react from '@astrojs/react';4 import svelte from '@astrojs/svelte';56 // https://astro.build/config7 export default defineConfig({8 sitemap: true,9 site: 'https://example.com/',10 integrations: [react({ include: ['**/react/*'] }), svelte({ include: ['**/svelte/*'] })],11 vite: {12 define: {13 'process.env.VITE_BUILD_TIME': JSON.stringify(new Date().toISOString()),14 },15 plugins: [],16 },17 });On top, you will add any
viteplugins you use in here too. For example, you might want to style your app with vanilla-extract. -
package.json: this is the regular file you will be familiar with from other projects. In here you will find defaultdev,buildandpreviewscripts. It is worth building locally frequently as you develop to check things work as expected. To do this, stop your dev server then runpnpm run buildand finallypnpm run previewto spin up the built static site. -
sandbox.config.js: config for running a CodeSandbox . -
public/this is like thestaticfolder in SvelteKit. You can throw your PWAmanifest.jsonfile, favicons androbots.txtfiles in here. In essence, the folder is for anything which does not need processing by Vite or Astro. -
src/: this is where your app files will go.src/pagesis used for file-based routing, which you might already be familiar with from Next.js or SvelteKit. Essentially, when you create a file in this folder, your app will have a page on the equivalent route. Sosrc/pages/about.astrocontent will appear on thehttps://example.com/about/page of your final app..astrofiles contain markup for your pages. You can consider the code in them to be a superset of HTML, meaning valid HTML code works in them and there are some extra features. We will look into these in a little more detail below. - Astro supports TypeScript out of the box.
- Astro supports Markdown input files out of the box as well as remark and rehype plugins . You can even have Astro enforce a schema for your Markdown front matter.
-
You need to install the React integration to use React components:
pnpm astro add react
remember also to add this to the
integrationsarray inastro.config.mjs(see above). -
You need to install the Svelte integration to use Svelte components:
pnpm astro add svelte
As with React, remember also to add this to the
integrationsarray inastro.config.mjs(see above)., -
You can install all your dependencies as dev dependencies (e.g.
pnpm i -D my-package). Like SvelteKit, Astro uses ES Modules and Vite takes care of bundling packages. -
We add global scripts to our Astro page header or components. Either
way, if you include the
hoistkey term, the script will be included in the page head section. Even if you include the same script in multiple instances of a component, Astro will only add it once.<script src="https://js.hcaptcha.com/1/api.js?render=explicit" async defer></script> -
You can add SEO meta directly to
.astropage head sections, similarly to scripts:<meta name="description" content={metadescription} /><metaname="robots"content="index, follow, max-snippet:-1, max-image-preview:large, max-video-preview:-1"/><link rel="canonical" href="https://example.com/page/" /> -
We need to add the autoprefixer manually by including a
postcss.config.cjsfile in the project root folder:postcss.config.cjsjavascriptmodule.exports = {plugins: {autoprefixer: {},},};and also install the package itself:
pnpm add -D autoprefixer -
Astro has inbuilt ability to create an XML sitemap automatically on
build. You can also set Astro to generate RSS feeds. For a sitemap, just update the config file thus:
astro.config.mjsjavascript1 // https://astro.build/config2 export default defineConfig({3 sitemap: true,4 site: 'https://astro.build/',5 });
-
If you need access to the site build timestamp, for example in SEO
components, add this snippet to the config file:
astro.config.mjsjavascript1 // https://astro.build/config2 export default defineConfig({3 // ...TRUNCATED4 integrations: [react(), svelte()],5 vite: {6 define: {7 'process.env.VITE_BUILD_TIME': JSON.stringify(new Date().toISOString()),8 },9 },10 });
then, you can access this in a component via
process.env.VITE_BUILD_TIME. -
client:idle -
client:visible -
client:media={QUERY} -
client:only Why use Astro to build your web app or static site? #
- Astro builds fast static sites and uses modern tooling for a fast and improved developer experience. Static sites are ones where typically the same content is served to every user and there is no need to log in to a personalized dashboard. Astro offers a feature called partial hydration, which minimizes the amount of JavaScript code that your server needs to send to the end user. This results in a faster page and a better user experience. You can code up your site pages in React, Svelte, Vue or even plain old HTML as well as any mix of those.
What is website partial hydration? #
- Traditionally, static site generators sent only HTML to the browser initially to give it a fast feel. The next phase of loading involved getting the JavaScript in to make the page interactive. This is the hydration step. This has inefficiencies since many parts of a page may have no JavaScript at all, yet are still “hydrated” along with the parts which actually need hydrating. A downside is extra JavaScript code gets sent to the browser to handle this. With partial hydration, you can control which parts of the page get hydrated, reducing the amount of JavaScript that has to be sent to manage hydration and making the page faster overall. You can even ship a page with no JavaScript at all. By default, Astro ships no JavaScript and you only hydrate what you want hydrating.
What is the Islands Architecture and Islands of Interactivity used by Astro? #
- Islands of Interactivity, just means you control when your components load. The idea being you load the page faster and improve user experience. You can set a comment form at the bottom of the page only to load when it becomes visible. You might set a chatbot to load only once the main thread has become idle. Of course, you can still set key components to load straight away. In fact, using an islands architecture means the key components can load faster. All these possibilities and more are available with Astro.
public and src folders #
🗳 Poll #
📝 10 Quick Astro Features / Gotchas #
🖥 What goes in an Astro File? #
We mentioned earlier that Astro is a superset of HTML. This means you
have access to the HTML head section in the .astro markup files and can add stylesheets and scripts. If you are used to
React, this is a little different, as there is no need to add a package
like react-helmet to inject SEO markup,
for example, to the HTML head section.
As well as the markup itself, the .astro files have an initial front matter section. It is demarcated like Markdown
front matter with three dashes (---)
at the start and end. However, it is more flexible than Markdown front
matter and allows JavaScript and even top level await (no need to wrap your async function expressions as an IIFE ). You use the front matter section to import components, and can
import React and Svelte components into the same file. Import using
the familiar JavaScript syntax, just use the filename as it appears on
the disk (this is contrary to how earlier Astro versions worked, which
you may see in old example code).
1 ---2 import ExampleReactComponent from '../components/react/exampleReactComponent.tsx';3 import ExampleSvelteComponent from '../components/svelte/exampleSvelteComponent.svelte';4 import BaseLayout from '../layouts/BaseLayout.astro';5 import { Content as MarkdownVideoContent } from '../ content/video.md';6 ---7 8 <html lang="en-GB">9 <head>10 <title>Rodney Lab Minimal Astro Example</title>11 <style>12 .container {13 display: flex;14 flex-direction: column;15 background: hsl(16 var(--colour-dark-hue) var(--colour-dark-saturation) var(--colour-dark-luminance)17 );18 color: hsl(19 var(--colour-light-text-hue) var(--colour-light-text-saturation)20 var(--colour-light-text-luminance)21 );22 padding: var(--spacing-8) var(--spacing-0) var(--spacing-32);23 }24 </style>25 </head>
Now we know the basics, let’s look at some Astro aspects in more detail.
🌟 10 Tips for Getting Started with Astro #
1. Getting Started with Astro: VS Code Integration #
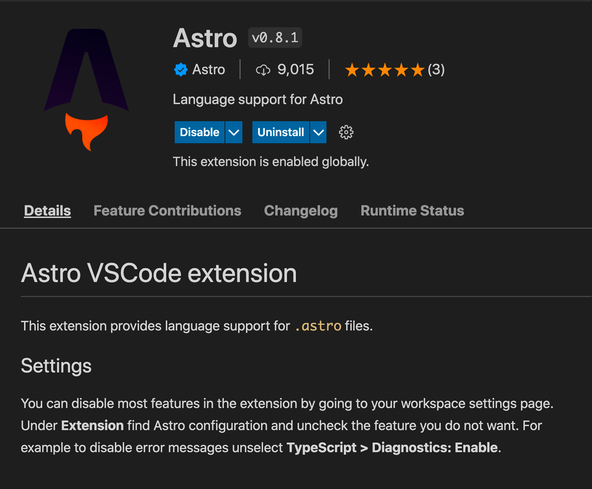
Astro have created an official VS Code plugin. You can find it in VS Code by going to View / Extensions then searching for Astro. The official extension has a blue tick and the publisher is Astro. This extension will give you syntax highlighting. For more detail, see the extension in the VS Code marketplace . If you use VSCodium, there is also an Astro Open VSX extension .

2. Using Astro: Prettier Formatting Extension #
There is also an official prettier plugin for formatting .astro files . You can use your usual extensions for formatting Markdown, React, Svelte.
pnpm add -D prettier prettier-plugin-astro
Consider setting up a couple of package.json scripts, so you can format conveniently from the command line and also
integrate formatting into your continuous integration process using Husky:
1 {2 "name": "getting-started-astro",3 "version": "0.0.1",4 "private": true,5 "scripts": {6 "dev": "astro dev",7 "start": "astro dev",8 "build": "astro build",9 "preview": "astro preview",10 "format": "prettier --write --plugin=prettier-plugin-astro .",11 "prettier:check": "prettier --check --plugin=prettier-plugin-astro ."12 }13 }
To format all files in the project, you can just run pnpm run format.
3. Getting Started with Astro: Favicon #
The minimal starter code includes a rel tag for a favicon in ico format. If you prefer to use a PNG file you
can, of course, just replace this. Either way, place your favicon file,
whether it is in PNG or ICO format in the public folder of your project, and it will be included in your app build. If
you are building a Progressive Web App, add all the icons needed together
with the manifest.json file to the public directory.
Instead of adding this rel tag to each route
file in your project, use Astro layout files. You can use these for content
which is the same on many pages. As an example, you can normally include
headers and footers in a layout file. The expected location for layouts
is a src/layouts folder. Here, we define
BaseLayout.astro and include the rel tag (for the favicon) in the HTML head section:
1 <html lang="en-GB">2 <head>3 <meta charset="utf-8" />4 <link rel="icon" href="/favicon.png" />5 </head>6 <body>7 <header>8 <!-- header content -->9 </header>10 <main>11 <slot />12 </main>13 <footer>14 <!-- header content -->15 </footer>16 </body>17 <html>
We then import this layout into any page files in which we want to use
it. In this example code above, we include the header and footer in
the layout. Then, the <slot /> tag serves as a placeholder for content from whichever pages chose to
use the layout. As an example, we could use this layout on our home page
like so:
1 ---2 import BaseLayout from '../layouts/BaseLayout.astro';3 ---4 5 <BaseLayout>6 <h1>Home Page</h1>7 <p>Home page content.</p>8 </BaseLayout>
Anything inside the BaseLayout tags gets
inserted into the layout in place of <slot />. You see, this cuts down on repeating boilerplate code.
4. Getting Started with Astro: Self‑hosted Fonts #
Self-hosting fonts can improve user experience when your site is
hosted behind a CDN, this is the default for hosts like Netlify and
Cloudflare. An easy way to self-host fonts is by adding @font-face directives in your CSS. We look in more detail at how to do this, including
shaving around 80% off shipped font file, in a separate video on Astro self-hosted fonts.
/* raleway-regular - latin */@font-face { font-family: 'Raleway'; font-style: normal; font-weight: 400; src: local(''), url('/fonts/raleway-v26-latin-regular.woff2') format('woff2'), url('/fonts/raleway-v26-latin-regular.woff') format('woff');}
5. Getting Started with Astro: Server or Browser? #
At some point, when working in React or Svelte, you will need to add a
check to see if your code is running on the (build or dev) server or
actually in the browser. As an example, you might run a media query in
your React code to check if the user prefers reduced motion. This
involves accessing the window object, which
will not be defined on the server. Astro has your back here. To stop your
code crashing, you can include a check to make sure it only runs on the
browser:
const ssr = import.meta.env.SSR;const reduceMotion = !ssr && window.matchMedia('(prefers-reduced-motion: reduce)').matches;
Here, ssr will be false when code runs in
browser. On the server, shortcut evaluation will result in reduceMotion being set to false without evaluating the second part where window is used.
6. Learning Astro: Environment Variables #
Environment variables offer a way to use private keys in your code,
without including them in the files which you commit, for example to
GitHub. Typically, you will need to include some environment variables
which you need exposed on the client. As an example, if you use
hCaptcha on your forms, there is a site key which you need to submit
from the user's browser to hCaptcha servers for each challenge. You
will also have some secret variables which you will never want exposed
on the client. To avoid accidentally exposing these secret variables,
Astro, makes you add a PUBLIC_ prefix to
environment variables which you have to expose on the client. You put these
in the .env file as usual:
PUBLIC_TWITTER_USERNAME="@askRodney"
For convenience, you might import all client environment variables into a single configuration file:
const website = { twitterUsername: import.meta.env.PUBLIC_TWITTER_USERNAME ?? '',};export default website;
and then use them in any client side code where needed:
import website from '../../configuration/website';const { twitterUsername } = website;
7. Getting Started with Astro: Node Packages #
You can use node inbuilt packages (fs, path, etc.) in Astro, you just need to prefix them with node:. As an example, in this snippet from a .astro file front matter, we look for blog posts in a particular directory in
our project:
1 import fs from 'node:fs';2 import path from 'node:path';3 4 const __dirname = path.resolve();5 const BLOG_PATH = path.join(__dirname, 'content/blog');6 const directories = fs7 .readdirSync(BLOG_PATH)8 .filter((element) => fs.lstatSync(`${BLOG_PATH}/${element}`).isDirectory());
8. Getting Started with Astro: Styling #
Astro supports styled components, vanilla-extract, SCSS and many other
flavours of styling. Since we can't get through all of those here,
let's look at good old CSS! For your Svelte components, you can
include scoped CSS styles like you would in SvelteKit, for example.
For React, you can include styles inline, or opt for CSS modules. In
the demo code, we went for another Astro alternative. We define the
scoped styles in the .astro file which includes
the React component. For this to work, we need to use the :global selector. Here we have the styles defined in the head section of the
.astro file:
1 <html lang="en-GB">2 <head>3 <title>Rodney Lab Minimal Astro Example</title>4 <style>5 :global(.react-container) {6 display: flex;7 flex-direction: column;8 background: hsl(9 var(--colour-secondary-hue) var(--colour-secondary-saturation) var(--colour-secondary-luminance)10 );11 align-items: center;12 width: 100%;13 padding: var(--spacing-8) var(--spacing-0);14 color: hsl(15 var(--colour-light-text-hue) var(--colour-light-text-saturation) var(--colour-light-text-luminance)16 );17 }18 19 :global(.react-container-alt) {20 background: hsl(21 var(--colour-alternative-hue) var(--colour-alternative-saturation) var(--colour-alternative-luminance)22 );23 }24 25 :global(.react-button) {26 background: hsl(27 var(--colour-alternative-hue) var(--colour-alternative-saturation) var(--colour-alternative-luminance)28 );29 }30 31 :global(.react-button-alt) {32 background: hsl(33 var(--colour-secondary-hue) var(--colour-secondary-saturation) var(--colour-secondary-luminance)34 );35 }36 </style>37 </head>38 39 <body>40 <ExampleReactComponent />41 </body>42 </html>
Then, as you might expect, we attach the classes to the React component itself:
1 import { useState } from 'react';2 import type { FC } from 'react';3 4 export const ReactExample: FC<{}> = function ReactExample() {5 const [altColours, setAltColours] = useState<boolean>(false);6 7 return (8 <section className={`react-container${altColours ? ' react-container-alt' : ''}`}>9 <h2>Example React Component</h2>10 <div className="video-container">11 <iframe12 width="560"13 height="315"14 src="https://www.youtube-nocookie.com/embed/PJ0QSJpJn2U"15 title="Should you Stop Using React"16 frameBorder="0"17 allow="accelerometer; autoplay; clipboard-write; encrypted-media; gyroscope; picture-in-picture"18 allowFullScreen19 />20 </div>21 <button22 className={`react-button${altColours ? ' react-button-alt' : ''}`}23 onClick={() => {24 setAltColours(!altColours);25 }}26 >27 <span className="screen-reader-text">Toggle colours</span>28 </button>29 </section>30 );31 32 };33 34 export default ReactExample;
We only use TypeScript here to show that Astro supports TypeScript out of the box. You can just as easily use regular JSX instead.
You will notice some other classes in the code. We defined related styles for these in a global CSS file together with global variables. We include as a regular import:
1 ---2 import '../styles/styles.css';3 ---4 5 <html lang="en-GB">6 <head>7 <meta charset="utf-8" />8 <link rel="icon" href="/favicon.png" />9 <meta name="viewport" content="width=device-width" />10 </head>11 <body>12 <slot />13 </body>14 </html>
For scoped CSS to be applied to components within the same file, just
include styles in a <style> block
in the page header (:global selector is
not necessary, in this case, as it is for child components).
9. Getting Started with Astro: ESLint #
Because you import everything as a dev dependency (perfectly valid), if you use ESLint, you may get a warning about importing extraneous dependencies. You can just switch this off by adding the following rule to your config file:
1 module.exports = {2 env: {3 browser: true,4 es2021: true,5 },6 extends: [7 'plugin:react/recommended',8 'plugin:jsx-a11y/recommended',9 'airbnb',10 'plugin:prettier/recommended',11 'prettier',12 ],13 parser: '@typescript-eslint/parser',14 parserOptions: {15 ecmaFeatures: {16 jsx: true,17 },18 ecmaVersion: 12,19 sourceType: 'module',20 },21 plugins: ['react', '@typescript-eslint', 'jsx-a11y', 'prettier'],22 rules: {23 'prettier/prettier': 'error',24 'react/jsx-filename-extension': [1, { extensions: ['.tsx'] }],25 'import/no-extraneous-dependencies': ['error', { devDependencies: true }],26 },27 };
10. Getting Started with Astro: Aliases #
Aliases can make restructuring simpler and also make code easier to read. As an example, they let you write:
import MyComponent from '~components/MyComponent';
instead of:
import MyComponent from '../../../components/MyComponent';
To set them up, just create any aliases you want in the tsconfig.json file in the project root folder:
1 {2 "compilerOptions": {3 "baseUrl": ".",4 "paths": {5 "~*": ["src/*"]6 }7 },8 "extends": "astro/tsconfigs/strict"9 }
Define baseUrl too (as above) to get this
working smoothly.
🙌🏽 Wrapping Up: Demo Playground #
Although this is not a tutorial as such, most of the code samples came
from a demo app. There are Svelte and React components in it, as well
as some Markdown. Each of these three includes an iframe with a YouTube video:
1 <body>2 <BaseLayout>3 <header></header>4 <main class="container">5 <h1>Minimal <a href="https://astro.build/">Astro</a> Example</h1>6 <p>This demo is not endorsed by Ben Awad, just thought the video content was fitting!</p>7 <ExampleReactComponent />8 <ExampleSvelteComponent />9 <section class="mdx-container">10 <Markdown VideoContent />11 </section>12 </main>13 </BaseLayout>14 </body>15 16 </html>
We mentioned earlier that Astro ships no JavaScript, by default. To
hydrate a component in Astro, you add client:load to the component's element (this is different to earlier versions of
Astro where you used a <Component:load>{content}</Component:load> syntax). Anyway, you will notice that we don't have those attributes
added in our code yet. However, the videos still play. Interestingly, this
is because they are iframes and so treated as independent documents. In
a real world app, you would want to lazy load these or at least have more
control over how they loaded. As it stands, the page loads a little slowly,
but remember this is a playground rather than a production app.
Please enable JavaScript to watch the video 📼
Beneath the React and Svelte videos, there is a button which should
toggle the background colour. Try cloning the repo and adding client:load to get a feel for how Astro works:
1 <ExampleReactComponent client:load />2 <ExampleSvelteComponent client:load />
The code for the demo is on GitHub . You can open the playground in StackBlitz or just play locally:
pnpm create astro@latest -- --template rodneylab/astro/tree/main/demos/getting-started-astropnpm installpnpm dev
Also, experiment with the other hydration props (you will need to tinker with the code for some of these to have a perceptible effect):
See Astro docs for more details on how these work .
I hope you found this article useful and am keen to hear how you plan to use Astro.
🏁 Getting Started with Astro: Summary #
🙏🏽 Getting Started with Astro: Feedback #
Have you found the post useful? Would you prefer to see posts on another topic instead? Get in touch with ideas for new posts. Also, if you like my writing style, get in touch if I can write some posts for your company site on a consultancy basis. Read on to find ways to get in touch, further below. If you want to support posts similar to this one and can spare a few dollars, euros or pounds, please consider supporting me through Buy me a Coffee.


Just dropped a new post taking you through what I learned getting started with Astro from square one.
— Rodney (@askRodney) December 1, 2021
I hope you find it useful!
If you got something from this thread, follow for more and also don't be greedy… share it too 😅
https://t.co/rWZC3tX60Z @astrodotbuild #askRodney
Finally, feel free to share the post on your social media accounts for all your followers who will find it useful. As well as leaving a comment below, you can get in touch via @askRodney on Twitter and also askRodney on Telegram . Also, see further ways to get in touch with Rodney Lab. I post regularly on Astro as well as SvelteKit. Also, subscribe to the newsletter to keep up-to-date with our latest projects.